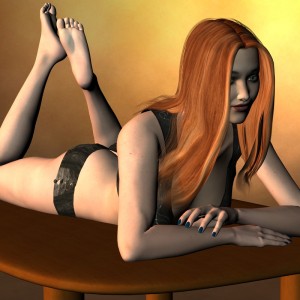
Here’s a typical render from DAZ Studio, as created by someone who is just learning their way around the program. The pose, lighting and table are from Adam Thwaites’s excellent (and regularly updated) Freestuff and the hair is the (also free!) Valens Hair by Dyald. The skin texture is Sira Black which looks great in the promotional shots, but here it’s…. not so good.
As far as renders go, it’s pretty typical and nothing to be ashamed of if you’ve got this far – but I’m going to show you how you can spend just a few more minutes before hitting CTRL-R to make it look much, much better!
The first thing to do is head into the Surfaces tab. Click on the entry for the Toenail texture then hold down SHIFT and press the up arrow on your keyboard 14 times. This selects all of the skin textures (arms, torso, head, etc) for Vicky. In the bottom box, scroll down and you’ll find that the Lighting Model for the skin is set to Plastic. This explains why the skin looks so…. well….. plasticky. That’s the default setting DAZ Studio uses when there’s no DAZ-specific information in the texture map, and that’s the case with most (90%+) of all skin textures designed for Poser.
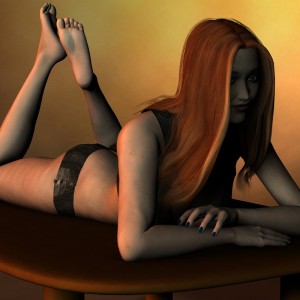
Change the Lighting Model to Matt, and your render quality has taken a sudden boost upwards. There is a specific setting for Skin, but I generally find that Matt gives better results unless you’re rendering high-key glamour shots – the Skin lighting model gives the texture a bit too much of a glossy glow for my tastes, though it largely depends on your preferred render style. Try both.
You won’t see this change to the scene until your render, and it’s the same with the next trick.
Shadows.
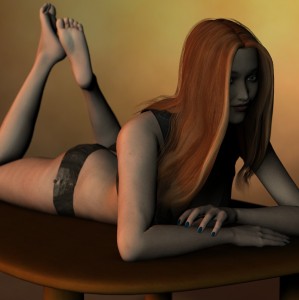
Lights designed for Poser (such as the set I’m using here) load into DAZ Studio with the shadows disabled by default. This is a Good Thing as it means your scene will render quickly, but it also means you’ll need to remember to enable them when it’s time for your final render. For this scene, I selected both lights in the Scene tab (click the bottom light then hold CTRL and press the up arrow to select the other), then in the Parameters tab set Shadow Type to Deep Shadow Mask and Shadow Softness to 45%. Hit CTRL-R and wait while it renders each shadow in turn then applies them to the final scene, and…….
MUCH better! But that’s not all. One thing which helps renders look “more real” is to use Depth of Field. This is the photographic effect where different parts of a scene look out of focus. This helps the eye to know which part of a scene to look at, and helps give a sense of depth. I’ve already covered how to use the ahRenderControl plugin to set up Depth of Field, set the Focal Point to Vicky’s Left Eye and an f/Stop of 5.6, and we get this:
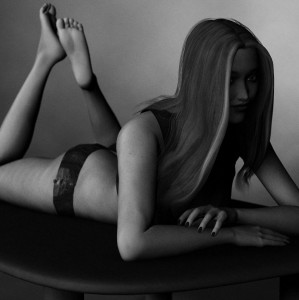
We could (and probably should) stop there, but it’s worth considering converting the image to black and white in Photoshop/GIMP. For some reason we see monochrome images as being “more realistic” than colour ones. Go figure.
Just a few minutes to change the skin texture, add shadows and apply depth of field, but a world away from the first image in terms of realism. Not bad, eh?

