If you’re reading this blog then DAZ Studio needs no introduction (and if this is your first visit, check out my Renders category!). It is my 3D rendering app of choice and is available in both fully functional free and pay (essentially free + a shedload of plugins) form. Fotosketcher is something I’ve looked at before many moons ago and it has come on in leaps and bounds since then with more options, filters and tweaky doodads being continually added to its svelte frame. In essence, Fotosketcher is Photoshop without the Photoshop – a simple to use program which lets you use and tweak filters to turn your photos (and renders!) into watercolours, oil paintings, sketches (hence the name) and more. It has very low memory and processor requirements so is particularly well suited to netbook use – I can easily run for DAZ Studio and Fotosketcher at the same time. In comparison, trying to run DAZ Studio and Photoshop simultaneously on a netbook is not a pleasant experience! As with DAZ Studio, Fotosketcher is 100% free and unrestricted though the author is more than happy to accept a few dollars donation for a cup of coffee and some cookies. Money well given and well spent, I say.
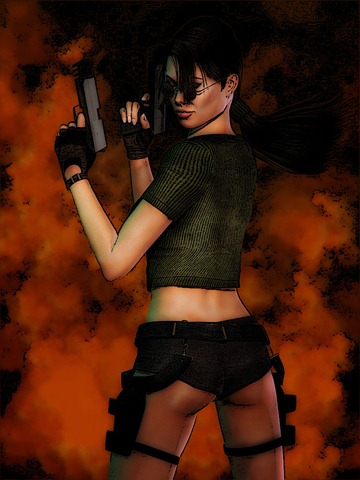
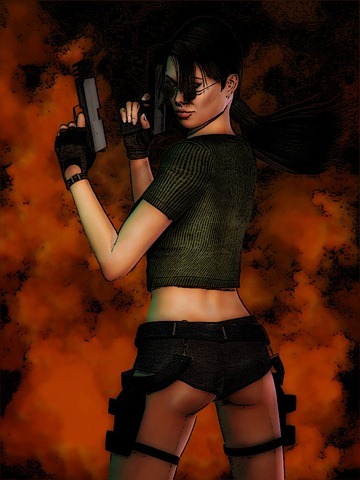
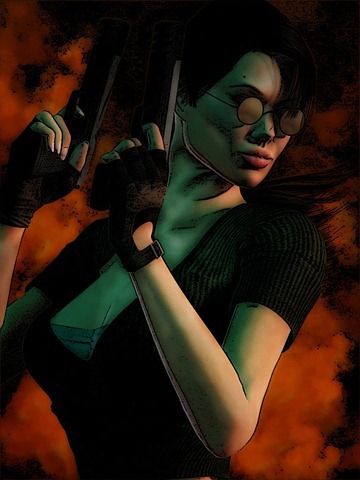
Combine the power of DAZ Studio with the magic of Fotosketcher and you can create images like this:
Here’s how.
Step One – Base image
First, take one render. I’ve already covered much of how to render using DAZ Studio is quite some detail (hint: start at the end and work forwards) so I’ll not repeat myself here. Graphic novel style renders tend to work best where there are large blocks of colour and the detail primarily in the focal character or action point. This isn’t a hard and fast rule – try out your own images and see what works and what doesn’t. I find that too much background detail just smudges together, though ymmv.
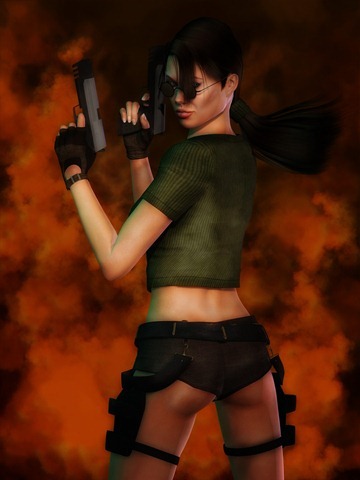
Here’s my starting image of a certain well known Tomb Raider. This is the sadly no longer available Hi-Fantasy Treasure Hunter set and the RMTH Lara character for Victoria 4. Add lights, pose, background and hit CTRL-R, and we’re done.
Step Two – Inking
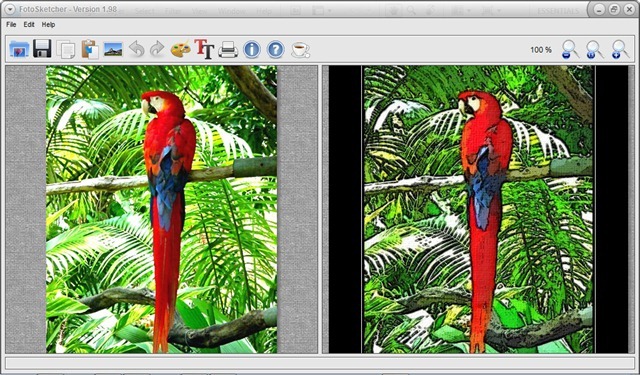
Now it’s time for Fotosketcher to shine. start it up and you should see something like this.
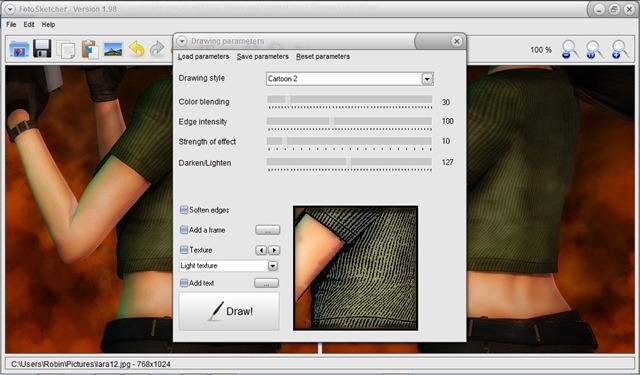
Press the left-hand icon in the toolbar to open your render, and the Drawing Parameters dialog box should automatically open ready for the fun to begin. If it doesn’t press the easel icon to bring it up.
Set the Drawing style to Cartoon 2 and the Edge intensity to around 100. This should give good thick inks – if it’s too much, drop it down and if it’s too little, add some more.
We hit could Draw! right away, but I prefer to remove all the colour from the image and merge the render and inks together afterwards. The Cartoon 2 setting makes great inks, but does things to the colours too that just look odd, in my opinion.
Move the Darken/Lighten slider all the way to 255 at the end, then hit the Draw! button, and save the result as a new image.
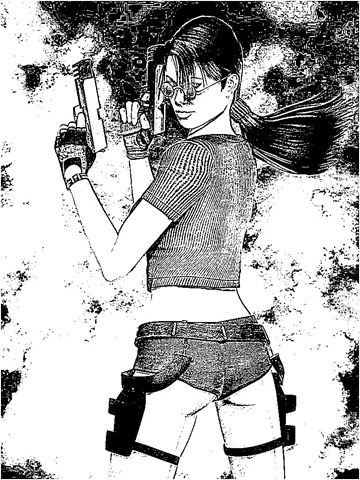
Beautiful, crisp clean inks! Lara Croft never looked so good. It’s tempting to stop here and call this tutorial “How to make old school images using DAZ Studio and Fotosketcher”. Let’s call this a tutorial-in-tutorial bonus, ok?
Step Three – putting it together
Finally, load the base render into your photo manipulation app of choice (Photoshop, Elements, GIMP, splashup, etc) then load, copy and paste the inks on top as a new layer. Set the layer mode to Darken (or equivalent in your app), and we’re done. Flatten the image, save it out then post on the web for all to see.
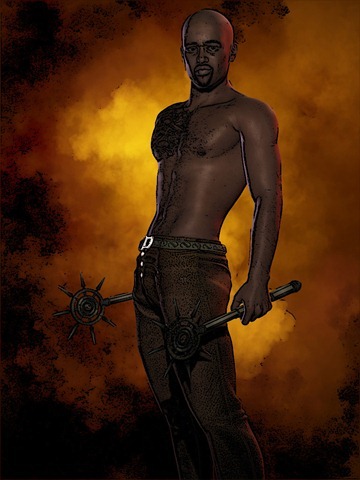
Here’s a few more examples using the same technique. This is Foundry, my Cleric Blacksmith D&D character who makes Warforged in his spare time.
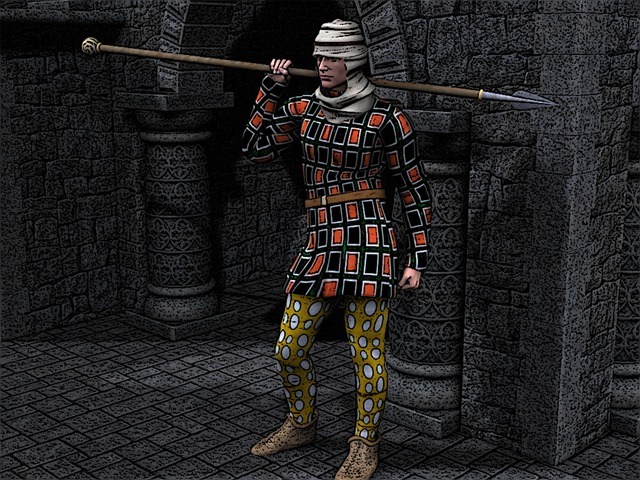
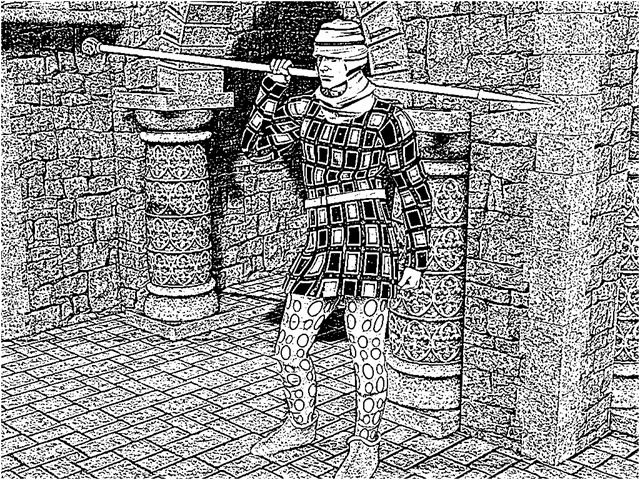
A Persian Guard to show that detailed backgrounds can sometimes work too.
Here he is in his old school glory! Not bad for a hi-tech render, eh?
Let’s end where we began – with another render of the lovely Ms Croft.
Till next time!

For a color cartoon effect in Photoshop similar to the Persian Guard example you can use Filter/Artistic/Poster Edges with default settings, followed by a generous contrast increase and maybe some added brightness. Finally run Filter/Artistic/Cutout and drag the sliders to taste.
Thank you! I would never have know about Fotosketcher had I not come across this tutorial. I’ve never been that happy with photoshop’s “Poster Edges” filter. This tutorial gives me something closer to the look I wanted!