The Multi Layered Image Editor is a rather useful plugin for DAZ Studio which adds a small slice of Photoshop’s functionality right into your favourite render app. What it allows you to do is create and apply layers to textures meaning that superhero logos, masks, makeup and more can all be added to your skin and clothing textures without needing any other application.
That’s the theory, anyhow. It falls a little short in it’s goal in that you’re still likely to need Photoshop (or GIMP, etc) to create the overlay in .png format, but being able to add the overlays from within DAZ Studio itself is darned useful.
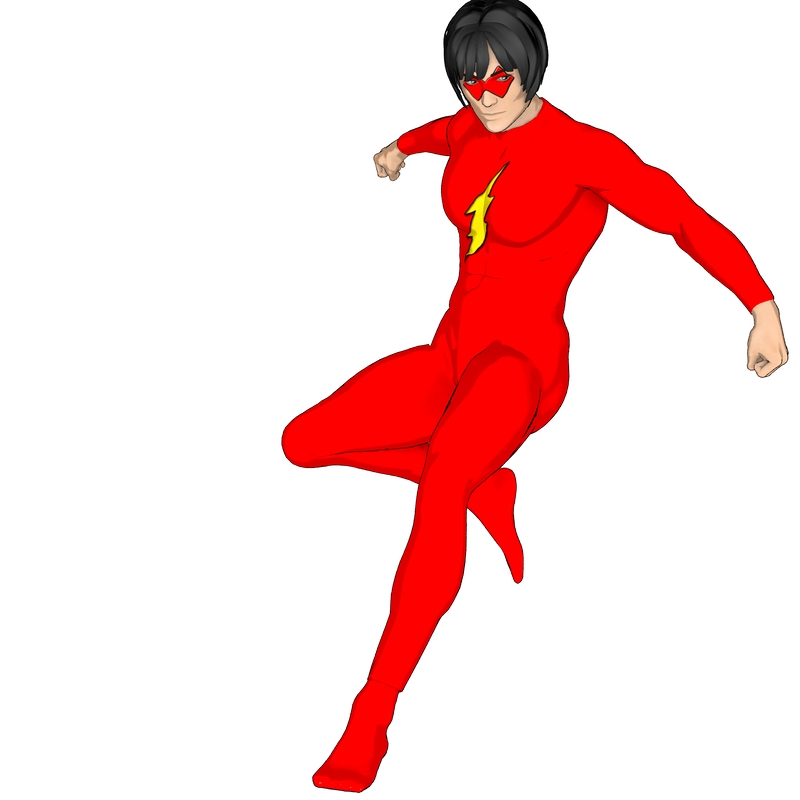
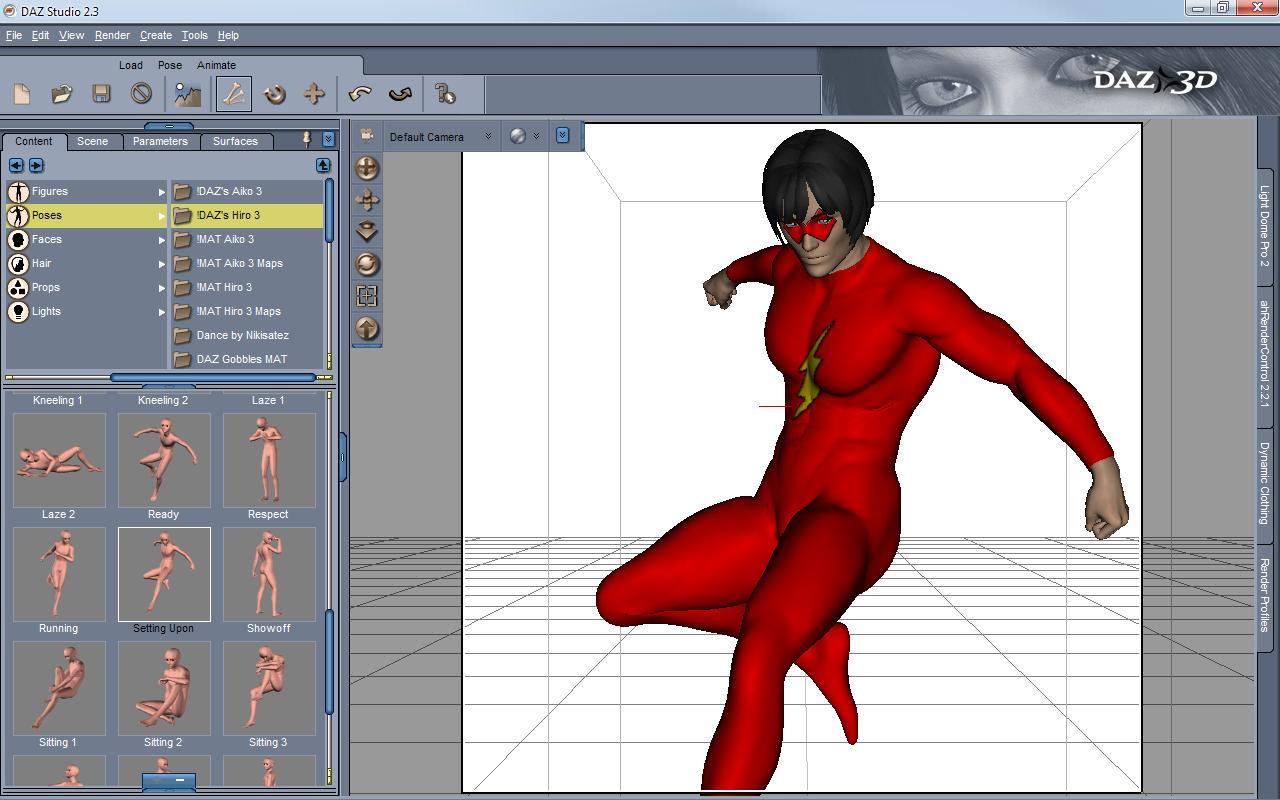
We’re going to use the plugin to create this guy, who I like to call Nu—Flash.
We’re going to use Hiro 3 for this render. As far as models go, he’s got a lot going for him: he’s free, comes with a complete set of rather excellent morphs as standard yet is still very memory efficient in use. He’s also texture-compatible with Michael 3 so there’s no shortage of great skins for him, and he also takes Aiko 3 hair without needing refits. What’s not to love?
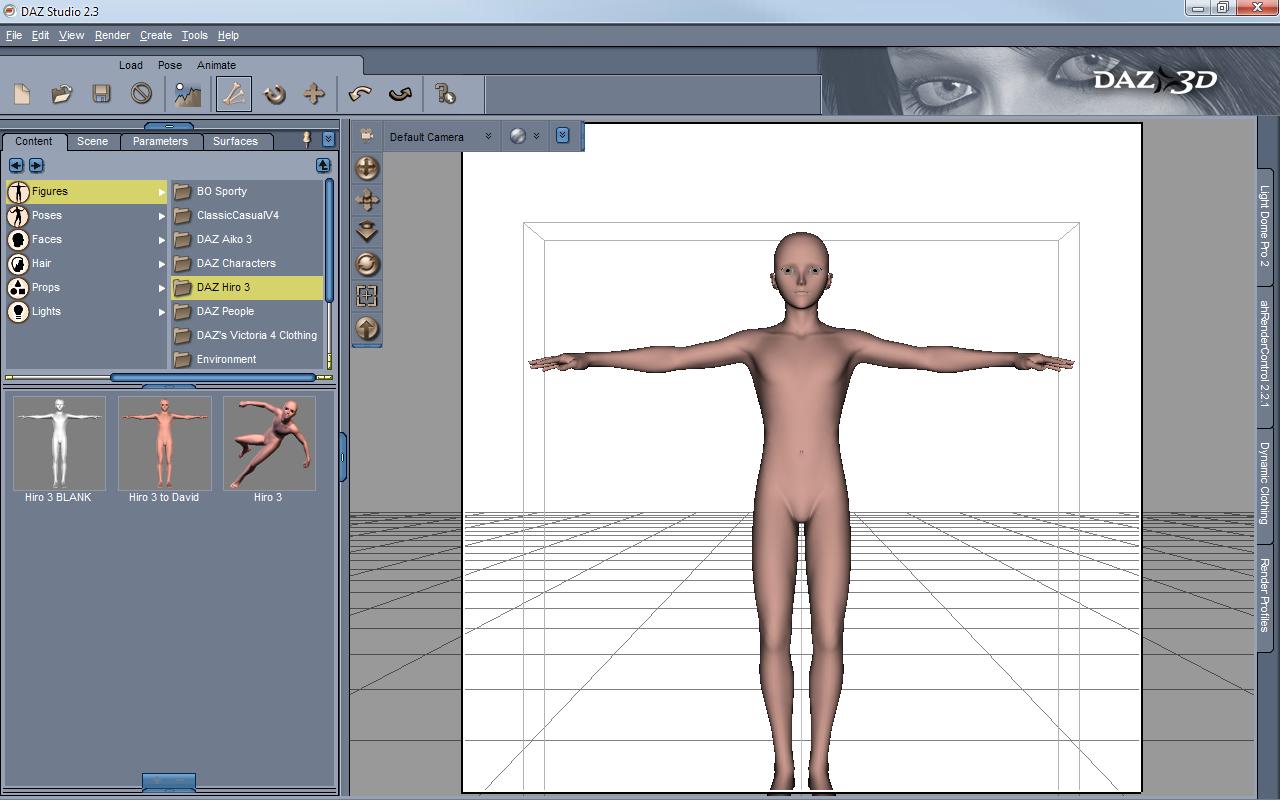
Load him into DAZ Studio, and Hiro 3 looks like a skinny generic manga runt boy:
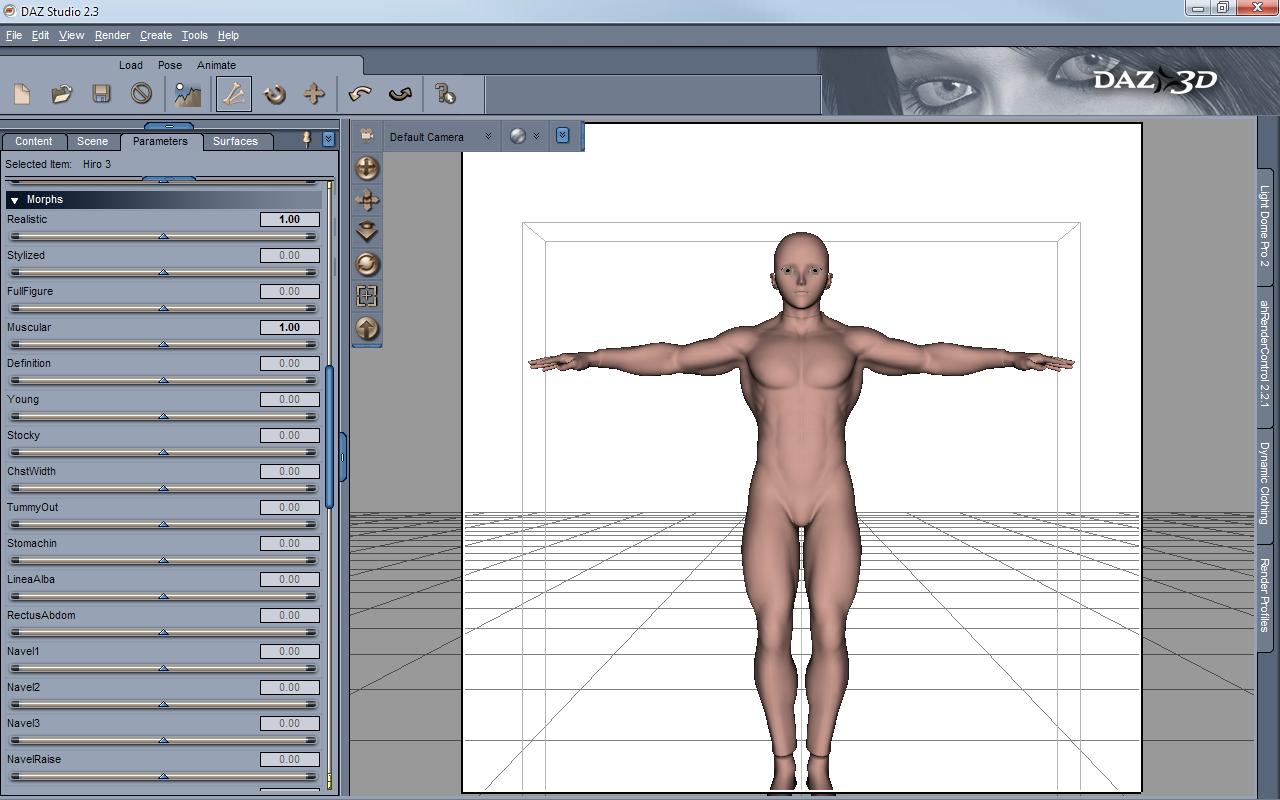
That’s easily fixed however. Over in the Parameters tab, set Realistic to 1 and Muscular to 1. While you’re at it, set NavelGone, HipSpandex, AnkleSpandex, NeckSpandex, WristSpandex and FootSock all to 1 too. We’re going to use the L.I.E. to paint a bodysuit into him.
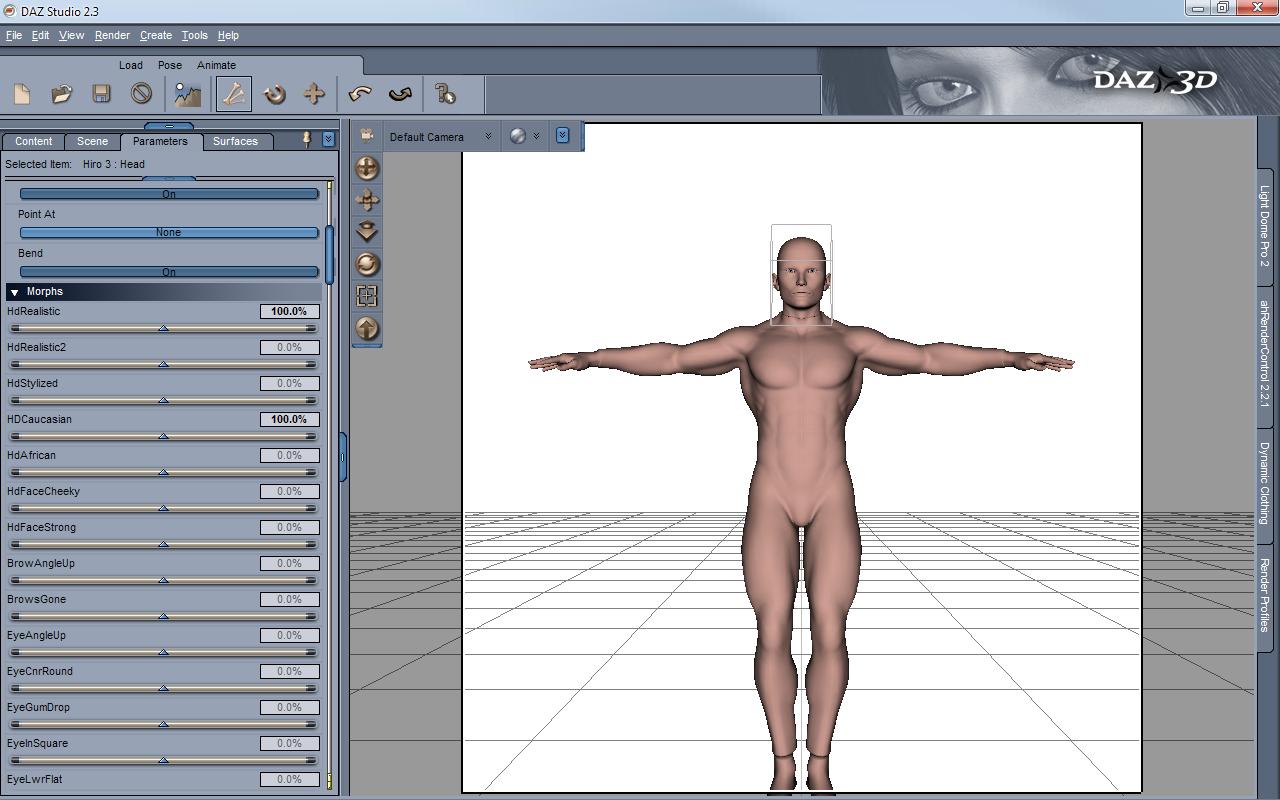
Almost ready. Select Hiro’s Head in the Scene tab, then set HdRealistic and HdCaucassian both to 100% to give him a suitably chiselled visage.
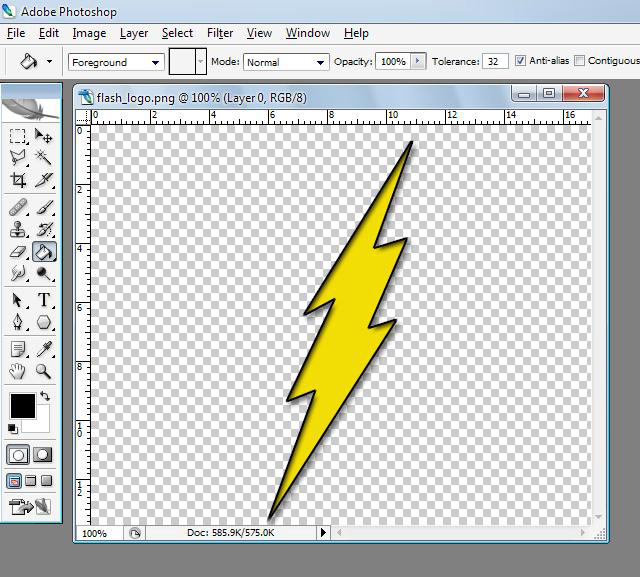
As this is going to be a comicbook-style render don’t worry too much about the skin; I applied Hiro’s Map01 texture and left it at that. Now, we’re going to need a Flash Logo. For this I enlisted the power of Google Image Search and selected a likely candidate. I fired up Photoshop then traced around the lightning bolt with the Polygonal Lasso Tool on a new layer. I filled the selection with yellow and added a Black Stroke and Drop Shadow as a Layer Style. Finally, delete the underlying .jpg image and save as a .png.
Why .png? Because unlike a .jpg, .png format files preserve their transparency information. As we’re going to be adding this as a logo we just want the lightning bolt visible, not a-rectangle-filled-with-white-containing-a-lightning-bolt. When it comes to layering, .pngs rock.
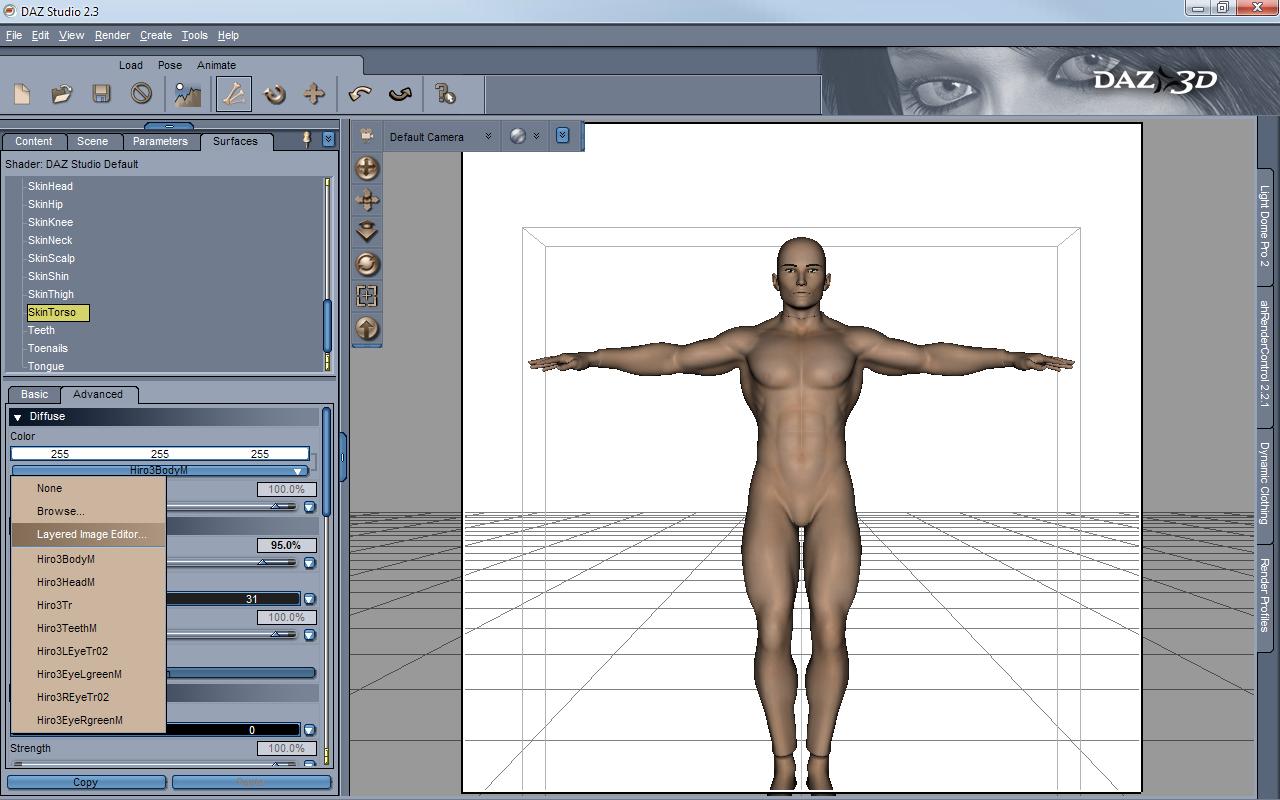
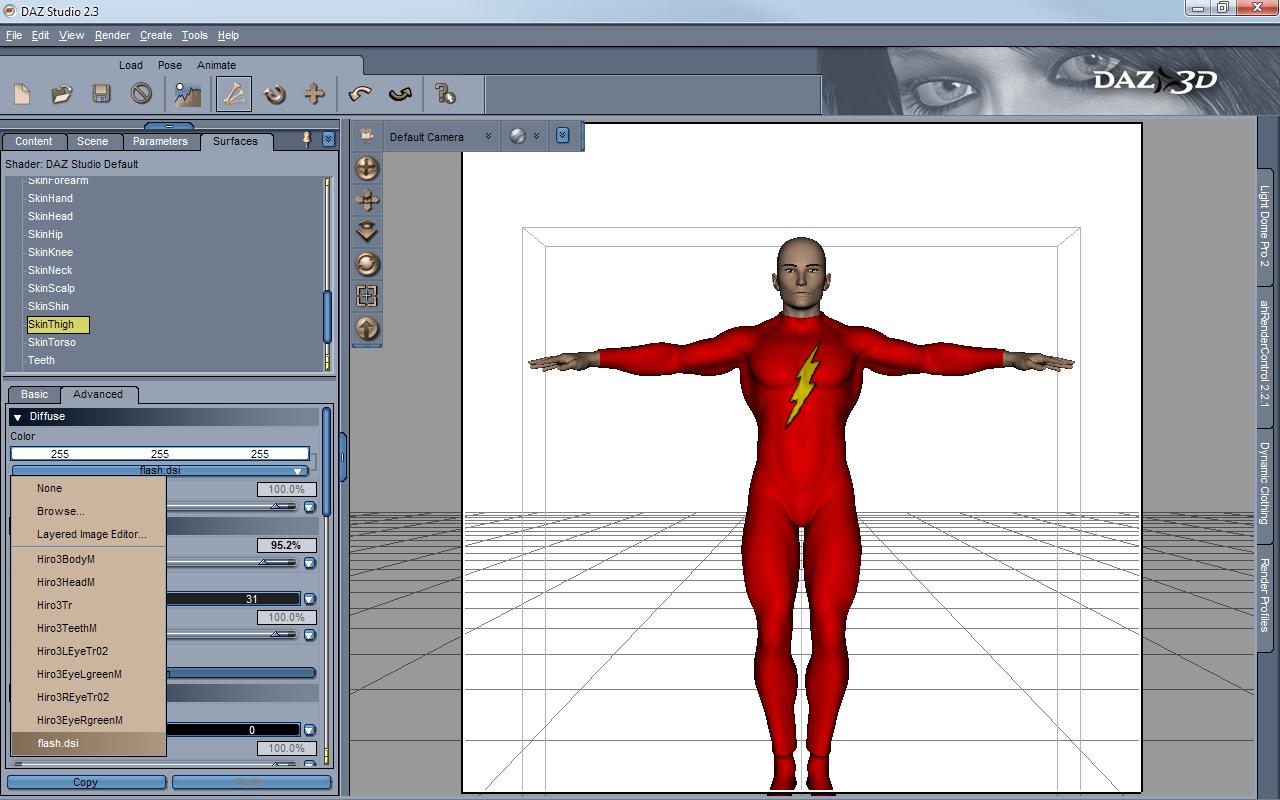
Anyhow. Back in DAZ Studio, go into the Surfaces tab and select SkinTorso. In the dropdown under Color, choose the Layered Image Editor.
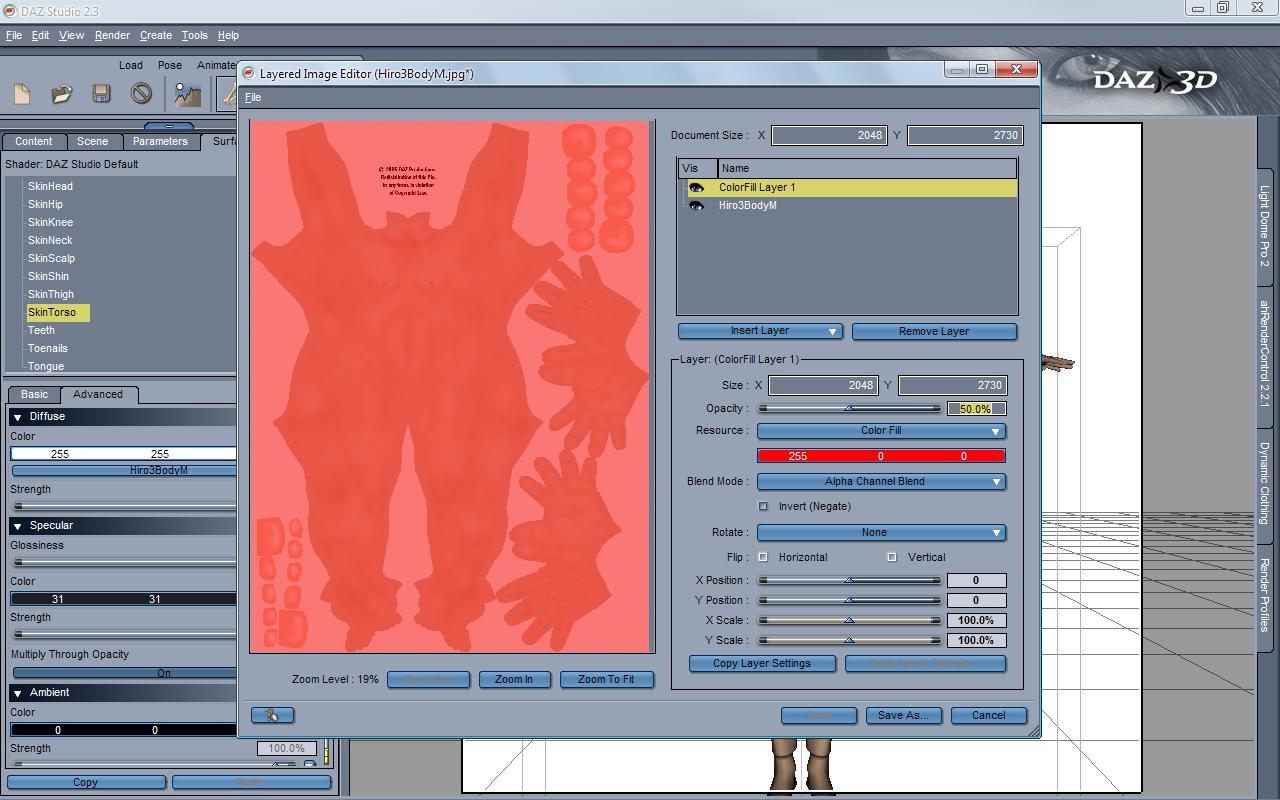
Press Zoom to Fit so you can see the whole texture map, then Insert Layer->Color Fill and set the colour to a bright red. Just for now, set the Opacity to 50% too so you can see the underlying texture map. We’ll push it back to 100% later – we’ve just lowered it to help place the logo. You should see something like this:
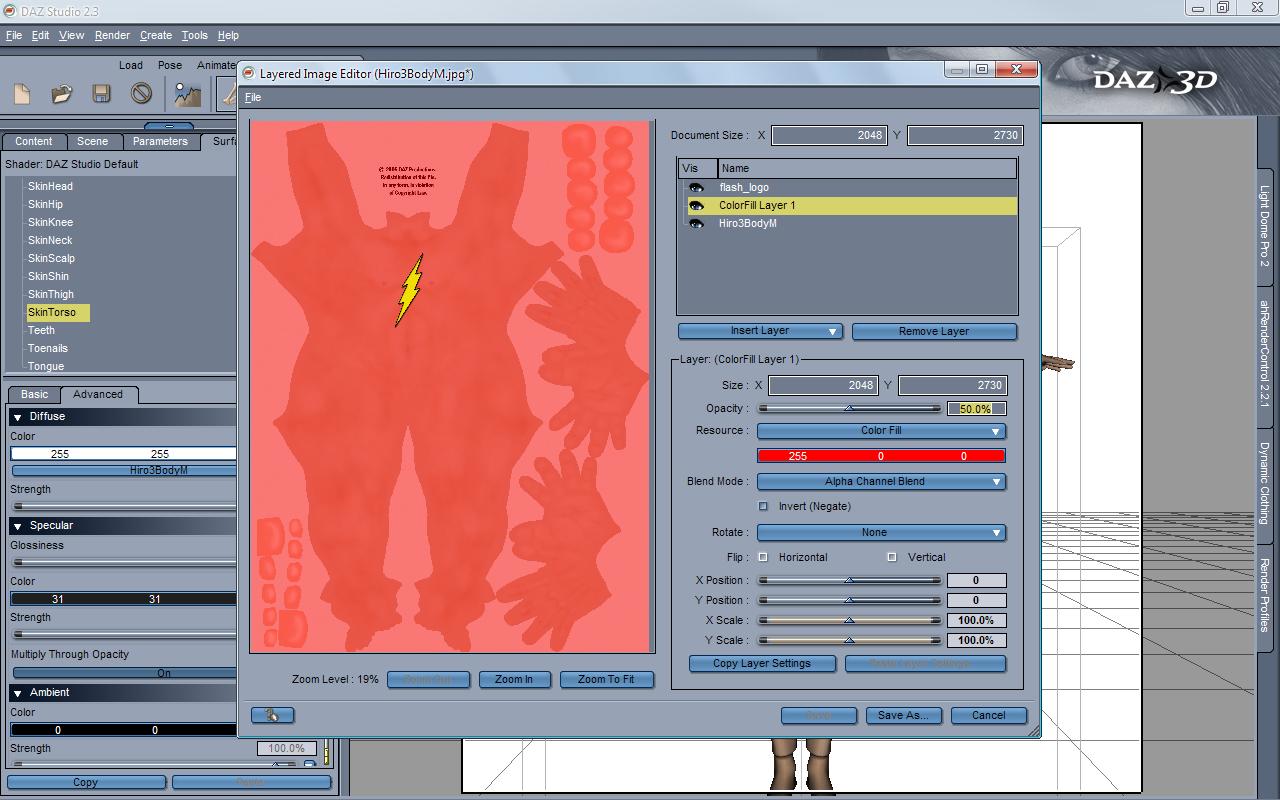
Now, Insert Layer->Image->Browse for Image and load in the .png flash logo you created. Drag it into place wherever you want it and scale to fit. When you’re happy, click on the ColorFillLayer and up the Opacity to 100% again. Yes, I know that dial is the wrong way around :D
Press Save As… to store your resulting layered image. Finally, select everything in the Surfaces tab you want to apply this new texture map to (Legs, Hips, Nipple, Arms, etc), and…….
Tada! Similarly, we can create a simple domino mask in Photoshop, save it as a .png, then apply it to the SkinHead texture. Done.
Now it’s a matter of adding Hair (I used Aiko 3’s Nyoko Hair Realistic coloured black) and posing.
For the final render, I used the comicbook style detailed in the previous tutorial using uberEnvironment, a Distant Light and pwToon.
The Multi Layered Image Editor doesn’t particularly do anything clever or special – it’s nothing you couldn’t do in Photoshop or GIMP before loading the final texture into DAZ Studio – but the ability to work inside DAZ Studio itself and see the changes as you make them makes this a rather useful plugin to own. Especially if you enjoy creating superheroes!

