There’s lights, and there’s lights. Of all the non-free lightsets out there for DAZ Studio, uberEnvironment is arguably the best. It’s also – until you learn now to use it effectively – one of the most frustrating.
uberEnvironment is so-called because it provides a complete environmental lightset which simulates the “all over” lighting you find in the real world. This gives soft directionless shadows and adds depth and ambient occlusion (more on that later) which improve the overall realism of a scene. Sounds wonderful, right?
The problem with uberEnvironment is that the default out-of-the-box settings are (and I’m being polite here) crap – but it’s easily fixed crap. Most folks tend to install uberEnvironment, try it once then conclude that it’s either broken or doesn’t work with their computer, and never use it again. Which is a shame, because once you know how to uncrappify it, uberEnvironment is nothing less than brilliant.
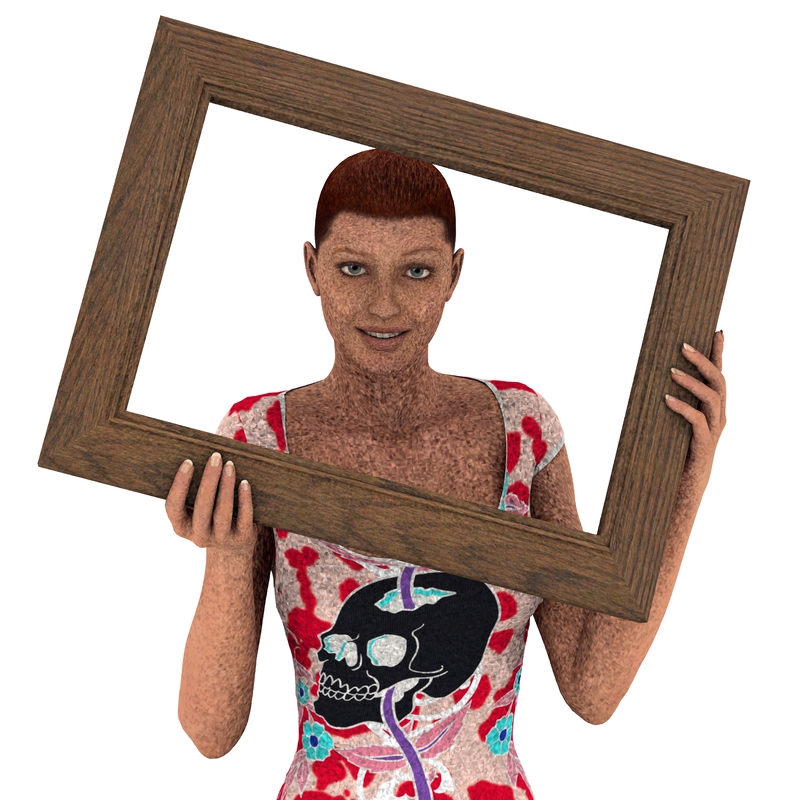
Here’s a quick render using uberEnvironment’s default settings so you can see the problem. This is default Vicky 4.2 with low-rez Natural texture, 3Dream’s freebie Boy Hair, a dynamic top and uberEnvironment’s default Base lightset.
Oh wow. That’s some serious skin complaint! This is caused because the Occlusion Samples setting in the light is much, much too low by default. This is good for fast renders, but bad otherwise.
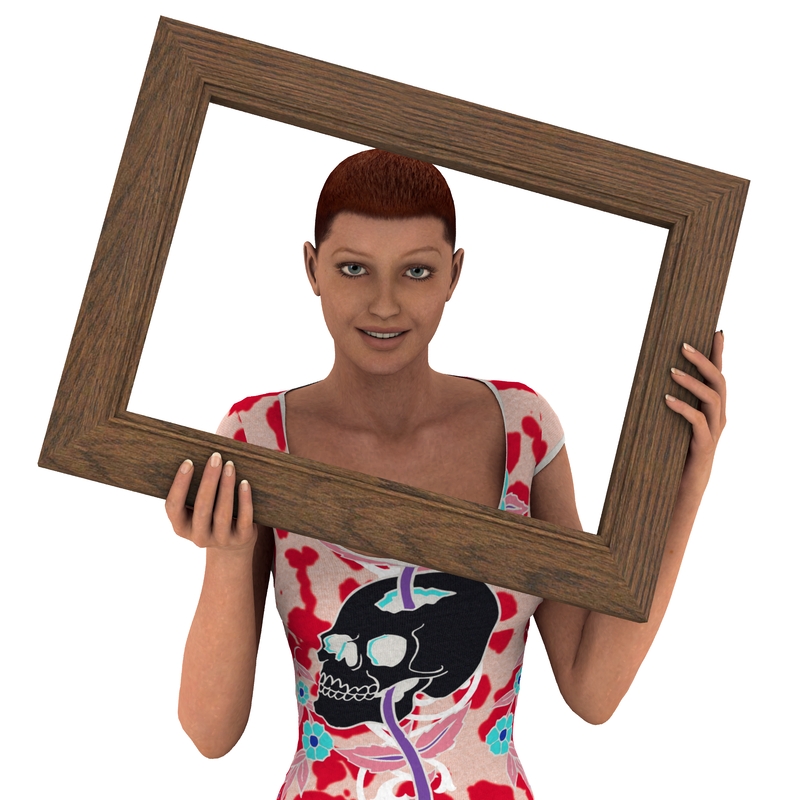
Raise Occlusion Samples (select the uberEnvironment in the Scenes tab, then hop into Parameters – you know this, right?) up to 128 from the default lousy little 8, and…..
There is a difference in rendertime but it’s not huge (in this case 10 minutes compared to 4) but the difference in quality is easily worth it.
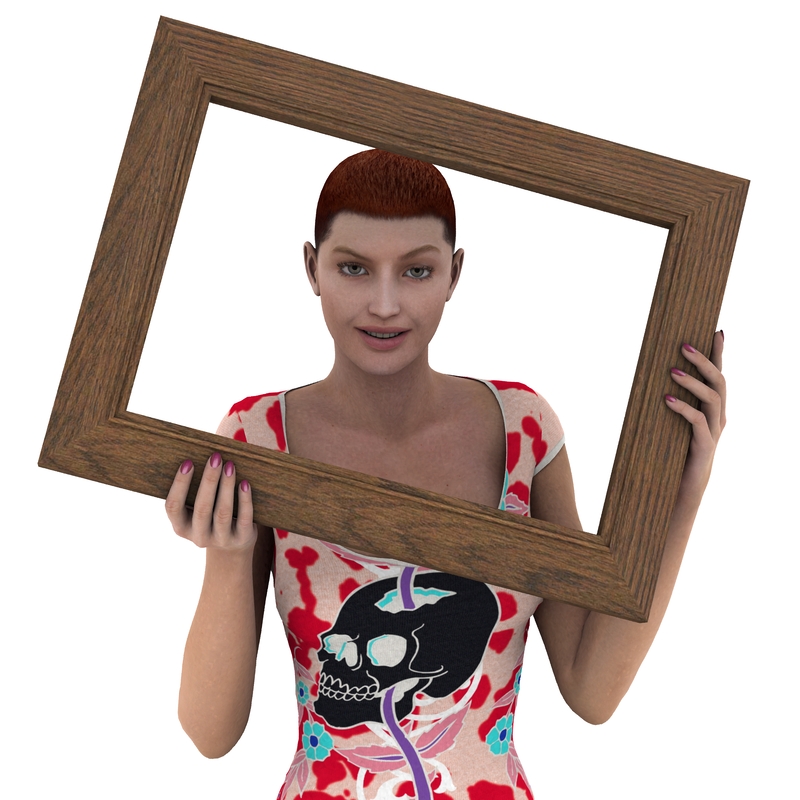
This is with the baseline lowest resolution skin texture, and it’s not half bad. Use a higher resolution one (such as one of the Elite textures) and/or the pwSurface and the quality can reach photo standard. Not bad for a twenty dollar lightset, eh?
What makes uberEnvironment so special is the way it handle shadows. It adds depth into the creases and folds of clothing and places shadows in a way that’s far more realistic that your average Shadow Mapped lightset. It also uses Ambient Occlusion to reflect light back into the shadows so that the underlying texture is still visible even in the darkest recesses. The net effect is an image which our brain interprets as being far more “real”. Check out the shadowing under Vicky’s fingers in the render above to see what I mean.
So if it’s so good why not use it all the time, Grey? Well, sometimes you don’t want or need this level of realism, and uberEnvironment rendertimes can easily run into several hours, especially if you’re using complex Hair. Hey, there’s a reason why I chose the Boy Hair for these images :D
Also, uberEnvironment sends light evenly across the entire scene. That’s good if you want a well-lit setup, but less useful if you want to render a darkened corridor or one spot illuminated by a central spotlight. You can add additional lights to an uberEnvironment-lit scene, but it’s harder to take them away. For realistic evenly lit scenes though, it’s one of the best solutions there out there.
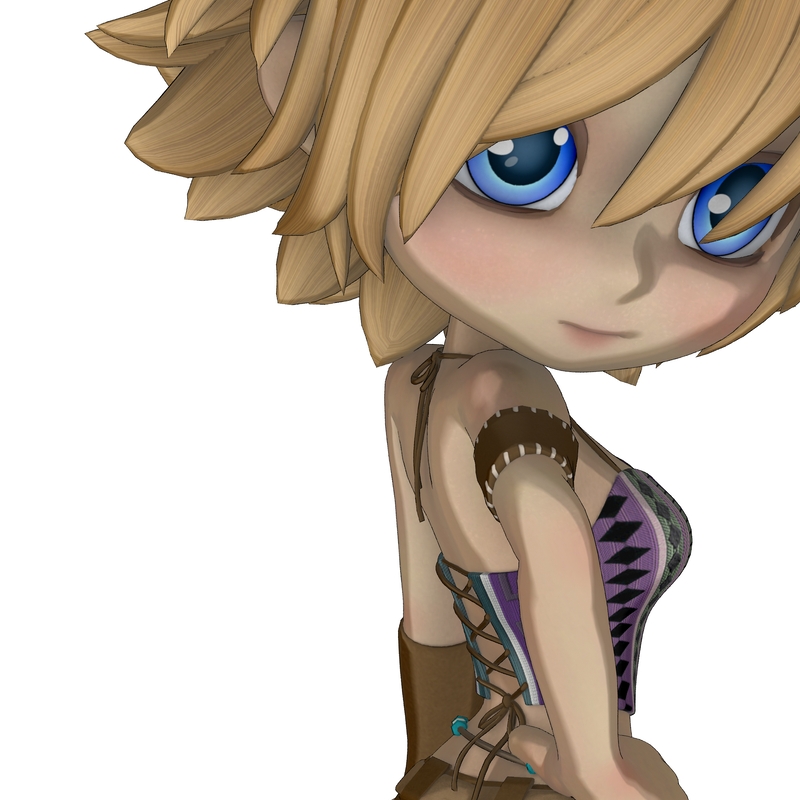
That’s not to say you can’t use it for “unrealistic” renders too. Use the Base uberEnvironment and add another Distant Light at 30% Intensity then apply pwToon‘s Snazzy Toon Shader to all the surfaces, and…….
One comicbook render, courtesy of uberEnvironment. Booyah.
Till next time!



Wonderful help, thankyou very much, Uber was a pest before I read this.
Hello Maria. I’m glad it helped – happy to oblige!
Precisely what I was looking for. I couldn’t understand why my custom-lit human renders didn’t have the same realism of others using DAZ. The answer: uberEnvironment and Elite texture maps. You’re a life-saver, Greywulf.
She still has white spots on her skin.
And in an animation these spots move on her skin like bugs.