UPDATE: The jlgShaders referred to in this post no longer work with the latest version of DAZ Studio. They were compiled and designed for DAZ Studio 2.3 and never updated to DAZ Studio 3. If you wish to create cartoon style renders in DAZ Studio, I recommend using pwToon instead.
This time around we’re going to turn the turn the reality dial down and show you how to make toon-style images in DAZ Studio. There’s a variety of ways to do this ranging from the quick-and-dirty but lacking in control (Render->Render Settings… and set the Render Style to Cartoon), to the excellent pwToon set of Shaders that allow you to render in a variety of styles ranging from Anime to Hanna Barbera-style cartoons, and everything in between.
We’re going to take the middle ground by using a free set of Shaders that allow you to mimic the cell-shading techniques of traditional comic artwork. Along the way we’re going to learn more about the Surfaces tab, and find out Just How Cool Hair Is.
You will need: DAZ Studio (well, duh); Aiko 3, Nyoko Hair and the Mech Girl outfit. These are all available as a part of the free 3D Bridge Starter Pack, so go grab ’em if you don’t already have them installed. You’ll also need joelejecko’s free jlgShaders. Download those, and unzip them into your Program Files/DAZ/Studio folder.
Got them? Ok, let’s get started!
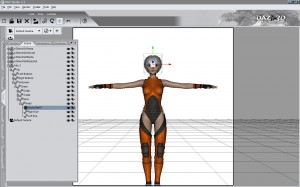
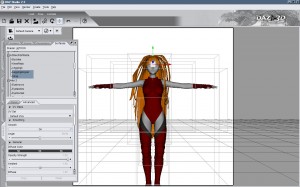
Fire up DAZ Studio, then load in Aiko 3 and add the complete Mech Girl outfit and Nyoko Hair (the one without the ponytails). Make sure that the outfit is all Fit To Aiko, and you should have something looking like this:
Let’s do the Hair thing first. Hair in DAZ Studio comes in two varieties: Hair loaded from the Hair folder, and those loaded from the Figures folder (and the occasional Prop Hair, but they don’t count). Hair-Hair (as opposed to Figure-Hair) auto-conforms to the selected figure and ends up hidden in the Scene tab attached to the Head. In this scene for example to find Nyoko Hair drill through Aiko 3->Hip->Abdomen->Chest->Neck->Head->NyokoHair01. On the other hand, Figure-Hair behaves much like an item of clothing. It sits on it’s own in the Scene tab and conformed using the Fit To dropdown box.
Hair-Hair is simple to use. Select the Hair, and you’ll find any morph options for the Hair in the Parameters tab. We’ll be doing that with the Nyoko hair in a mo’. Figure-Hair tends to be more complex and may have Morphs and Adjustments for different parts of the hair. For example, the adjustments for the free Glamor Hair for V4 provided with DAZ Studio as standard are hidden in GlamorHair V4->Chest->Neck, and there’s lots of ’em – that Glamor Hair is a terrific first hair to learn all about how to control the Hair in DAZ Studio.
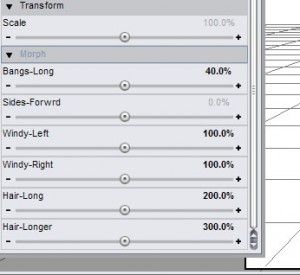
But anyhow, back to Aiko. Select the Nyoko Hair then head into the Paramters tab. As standard, this is a pretty neat anime short hairstyle – but we’re going to change that. Set Bangs-Long to 40%, Windy-Left and Windy-Right to 100%, Hair-Long to 200% and Hair-Longer to 300%. Wow. That short hair sure ain’t short anymore!
We might need to adjust the hair a little when we apply a pose, but that’ll do for now.
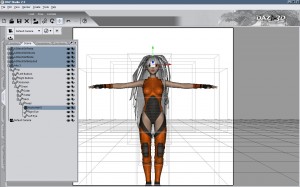
Now to apply the Shaders. In the Scene tab make sure you’ve got Aiko 3 expanded so you can see Nyoko Hair. Click Aiko 3 then hold down SHIFT and press the up arrow four times to select the Bodysuit, Boots, Gloves and Pants too. Then CTRL-Click on the Nyoko Hair too so that everything is selected, like this:
Next, in the Surfaces tab click on a line (any line) then press CTRL-A to select everything in there too. Now, you’ve got all of the objects in the scene selected, and all of the surfaces too. Cool.
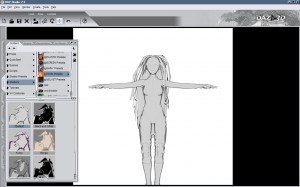
In the Content tab, head into Studio->Shaders->jlgToon Presets and double-click !!Default. All the color’s gone! Make sure that your Render Style is set to Normal, then hit CTRL-R to do a quick render.
Ooo! Toony! Now to add colour. The trick here is to use as few colours as possible. Keep things simple, and it’ll look much more effective. Let’s start with the Hair again. Head into the Surfaces tab. We’re going to be there for a while.
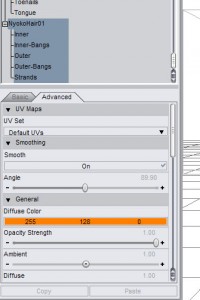
Select Nyoko Hair (this auto-selects all of the material zones), and set the Diffuse Color to something funky. Orange, say.
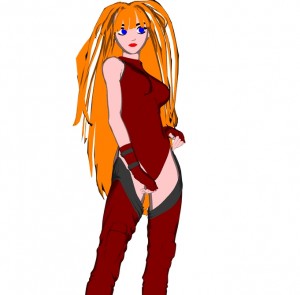
Next select the Bosysuit, then CTRL-click all of the other parts of the Mech Girl outfit (boots, gloves, etc) and set the Diffuse Colour to another colour. I picked dark red, but if you want yours green there’s no accounting for taste. That’s probably a little too much of the same colour, so click then CTRL-click all of the straps, buckles and the upper leggings and change those to a dark grey. You should end up with…….
Finally, we need to add a little colour back into Aiko. Select all of Aiko 3, then set her skin colour to a faint pink (RGB 255, 200, 200 is ok), lips to red (or goth black), Eyebrows and Eyelashes to black, Eyewhites to White and left and right Cornea to Blue.
Back in the Scenes tab, click on Aiko 3 so she’s the only object selected and choose a suitable Pose from the Content tab. Adjust the Camera to taste, and render.
This is another one of those things in DAZ Studio that takes longer to describe than it does to do. Once you’re up to speed, it takes a matter of mere moments to select everything, activate the toon shader then start blocking out colours like a pro.
Till next time!

I didn’t get pwToon, but I did get pwEffect. If I want to render something cartoon style; I’ll just use the render to cartoon option in the render settings dialogue.
Eltons last blog post..Hiro 4
Thanks for the walkthrough. Your constant posts with images have caused me to download DAZ and try it out.
Wimwicks last blog post..Skill Challenge: Information Gamble
I get an error message for jlgTOON:
3Delight message #45 (Severity 2): S2068: shader ‘C:/DAZ/Studio/shaders/jlgTOON.sdl’ uses a different interface version: please recompile
This prevents interim shades, making the render look superflat (no shading at all, just the colors I chose manually)
I’m using DAZ Studio 3.1.2.16 beta.
Anything I can do? Can I install the stable version alongside the beta? It’s a shame if the new version breaks all the free shaders.
Unfortunately, joelegecko never updated these excellent Shaders to work with DAZ Studio 3. To update them the Shaders needed recompiling for the new 3Delight render engine, and joelegecko had lost much of the source code during house and work moves.
If you want to render direct-to-toon in DAZ Studio now, the best option is pwToon.
I’ll update this post to say that the jlgShaders are out of date.
Waah… that makes me cry. It’s always sad when somebody loses their hard work due to circumstance. pwToon does not have close to the functionality that jlgShaders have, and it costs $25.
However, can I run DS2 alongside DS3? I could use DS3 with all the IK and other functions to set up a scene, then do the shaders and rendering in DS2. I wonder if the .daz files are backwardly compatible?
Thanks a lot for your rapid reply, and as always, great work on the tutorials. I haven’t played AD&D since Uni, but I certainly remember how fun it was to play… it was closer to acting than to playing a board game.
You can have both DS2 and DS3 on your computer at the same time, yes – they live in different folders. I know some folks do that because there are some plugins as well as Shaders which still haven’t been ‘ported over.
AFAIK, daz scene files should work between both versions provided you don’t use any DS3 specific features such as the Shader Mixer or Dynamic cloth. Only one way to find out, I guess :D
Thinking about it, there is another solution – try the Cartoon render style that’s built into the 3Delight render engine. Chenge the render style in Render->Render Settings.
A good starting point is to add a single Distant Light to the scene, leave Intensity at 100% and enable the Shadow Map at 10% to give a bit more definition to the edges.
Let me know how you get on!