This post was meant to answer be a question-and-answer session where I reply to any questions thrown up about DAZ Studio. The first question asked raised a topic worthy of a post all by itself, so here it is! Keep posting the questions up, and I’ll use them as fodder for future tutorials. Keep those questions coming!
Blaquesaber asks: Is it possible to change the colour/illumination of just an area of a character’s suit? Say a “V” shaped swash across the chest ala Nightwing?
Absolutely! There’s a number of ways to do this, ranging from the lazy (just postwork ’em in afterwards) to the overly complex (adding logos and insignia as complete objects). The usual, and ultimately simplest way, is to create a copy of the texture and add the design or logo in Photoshop/GIMP.
This tutorial over at DAZ3d goes into excellent detail how to turn a skin texture into a faux bodysuit using the Power of Photoshop, and the principle is the same for any kind of texture work.
In short, it boils down to three steps:
1. Make a copy of the existing texture (never EVER edit the original!)
2. Edit the texture in Photoshop/GIMP/whatever to add in the logo, suit design, etc
3. Apply the new, edited texture to the figure in DAZ Studio
The first step is sometimes the most difficult as that involves finding the existing texture of the object you’re working with. Thankfully, DAZ Studio has a few tricks to make it pretty easy. Let’s use the Michael 4 Bodysuit as an example and turn it into a passable Green Lantern outfit. Follow me……….
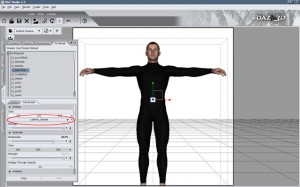
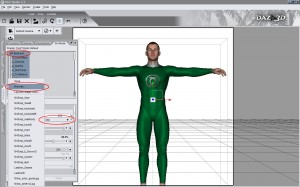
I’ve loaded Michael 4 and the Bodysuit into the scene, then hopped over to the Surfaces tab. Select one of the Bodysuit’s surfaces (SkinTorso, say) and in the Advanced tab you’ll see the filename (in this case, Leather_Seams.jpg). Click on it, then select Browse. This will give you a dialog box with the folder location (Runtime/textures/DAZ/M4BodySuit). Ha! Detective work! Copy the file from there to someplace safe. I use My Pictures/templates, just to play safe. Like I said, never EVER edit the original!
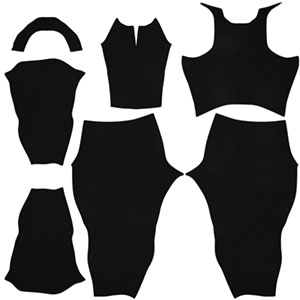
This is what the texture looks like when it’s not wrapped around a figure (reduced resolution):
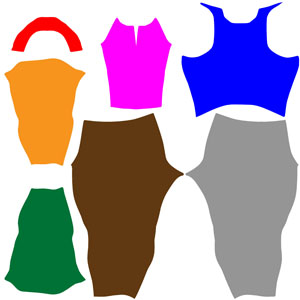
The first this I do when working with something new is colour-code all of the parts to help me see what goes where. That’s a case of using lots of different, easily identifiable colours and bucket fill on each element. That gives me something like this.
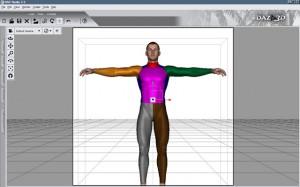
That might not look helpful, but when applied to the bodysuit (I’ll be explaining how, later), I get this:
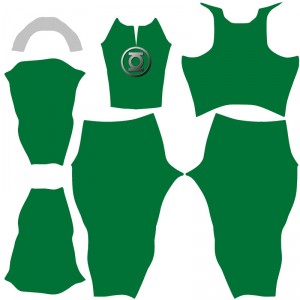
Very pretty! It also shows which parts go where, which is darned useful. Back into Photoshop and we can change the colour of each part, add logos, etc. As this is going to be a bodysuit for a Green Lantern, I’ll pick…. uhhh…. Green, and a Lantern logo. Well, duh. I’ll make the collar grey to make it all look official, and (for the purposes of this tutorial), leave things at that. Adding piping down the arms, etc is something you can try at home, folks. There’s readily available seam guides for all of the bodysuits, and templates for most clothing items, either bundled with your installation or freely downloadable from where you bought the content. Use ’em if you can get ’em!
Anyhoo. The end result looks like this (again, reduced resolution):
Back in DAZ Studio, go into the Surfaces tab and select M4 Bodysuit so that all of it’s pieces are selected. Under the Diffuse section, click the filename and Browse for your newly-edited texture. Ta da!
That’s great, but what if you want to remove the collar, make parts of it transparent, etc? Where possible, I always create a full bodysuit because then I can hide elements (ie, change the Opacity in the Surfaces tab to 0%) to create multiple suits from one texture set.
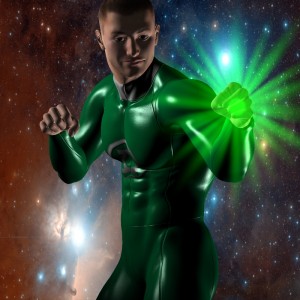
In other words, we can go from this:
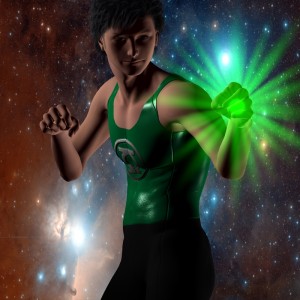
To this……..
With just a spin of the M4 Morph dials, a colour change on the bodysuit hips and legs and hiding the arms and neck. Two characters. One texture. See?
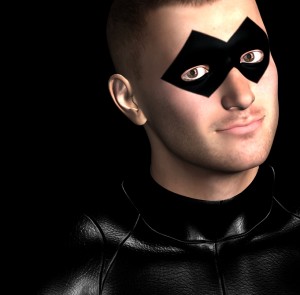
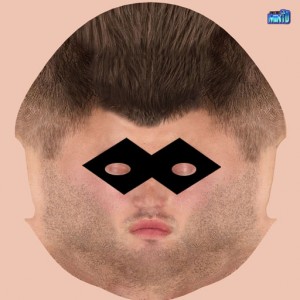
It’s not just the bodysuit you can apply this to – anything in DAZ Studio with a texture template (which is pretty much everything) can be recoloured and retextured by you. For example, to create this Domino Mask for Michael 4:
I just copied M4Smpl_face.jpg, added a mask shape in Photoshop, and applied my newly edited face texture in the Surface tab.
Might not be the best looking domino mask in the world, but it took all of 5 minutes, so I ain’t complaining :D
Till next time! Keep those questions coming!



Why does that last graphic inspire me to make my Tucker kobolds skin people?
Who knows?
Eltons last blog post..Rolemaster Adventure: Interlude