I’ve been experimenting in DAZ Studio lately (as is my want) at creating a style of image which hearkens back to the cheesy D&D images of the ’90s. This was a time when every fantasy artist wanted to be Boris Vallejo, and few succeeded.
Normally when you mention Boris Vallejo thoughts immediately turn to naked (or half-naked) women in a temple. Something like this, in fact (one of mine, NSFW).
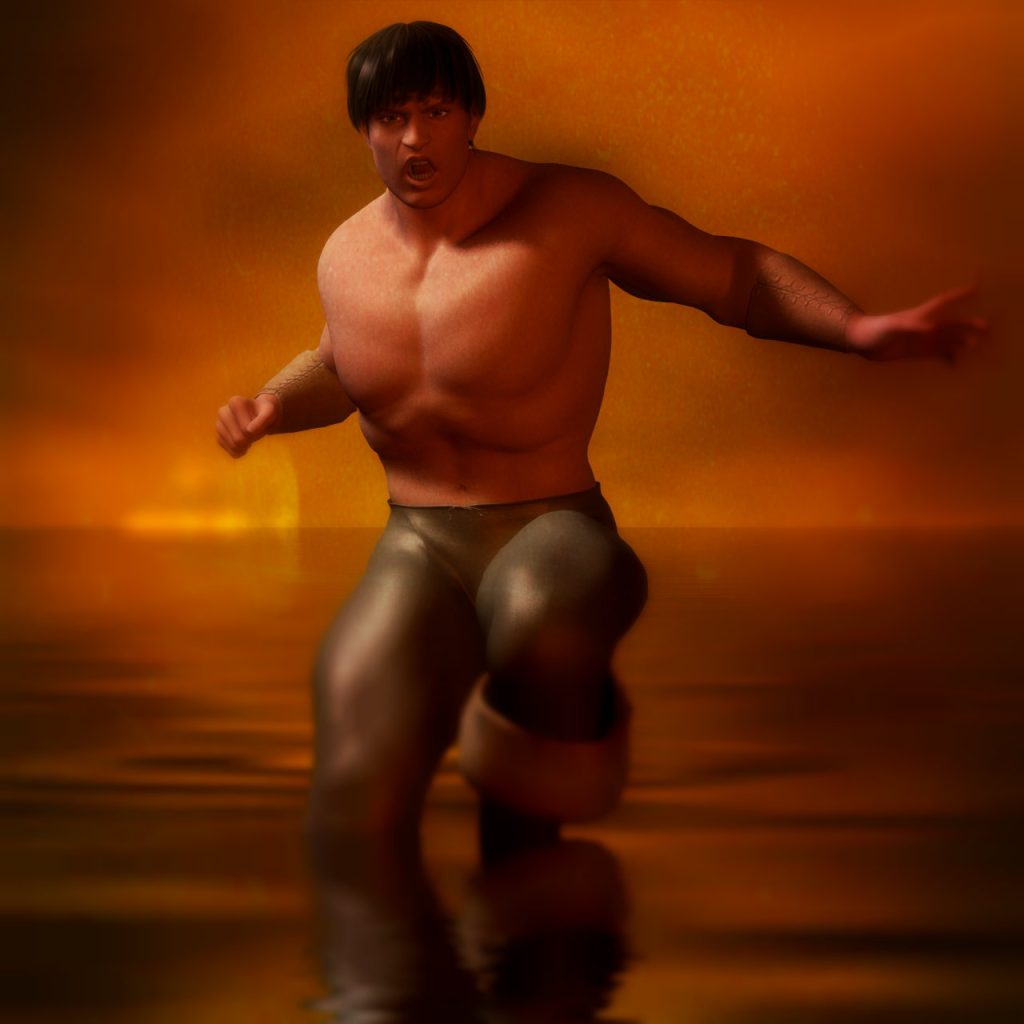
But not this time. This time I’m interested instead in the style of his Safe For Work imitators where images are brash, high-contrast in-your-face Fantasy scenes with the Hero (or villain) is Posed Dramatically in the centre. The kind of image that would grace the cover of Dragon magazine, or a dime-store fantasy novel. This kind of image, for example:
Today I’m going to show you how to make your very own Cheesy Fantasy Art. The image above, in fact.
You will need:
- A copy of DAZ Studio Pro
- The Chrome web browser
- Pixlr Express for Chrome
- Photoshop, or another graphics application which can use Photoshop Filters
- Flaming Pear’s Flood demo plug-in
DAZ Studio Pro is currently available for free and the nice people at DAZ 3D keep extending the deadline. I suggest you grab it now rather that wait and kick yourself in the future when it’s no longer free. Go on. I’ll wait.
Chrome & the Pixlr Express Extension is a great way to add light, contract and vignetting effects to an image. It’s like Instagram for your PC, but with more customization capabilities. Pixlr Express is a great tool to quickly add toning and vignettes to an image. That’s what we’re going to be using it for here.
Flood, as the name implies, adds a water plane to your scene. It’s a great way to add reflections to your renders without suffering the huge increase in render-time that usually goes with them. I like. If you don’t have access to Photoshop, you can skip this part of the tutorial.
On with the show.
Hopefully yours will look somewhat different (better, I hope) to my render above, and along the way you should pick up some ideas and a desire to create renders of your very own. That’s the plan, anyhow.
In the first part of this tutorial we’ll be setting up the initial image in DAZ Studio and finishing when we hit render. In Part Two we are going to take a close look at Postwork, that all-too-often forgotten element in creating 3D renders.
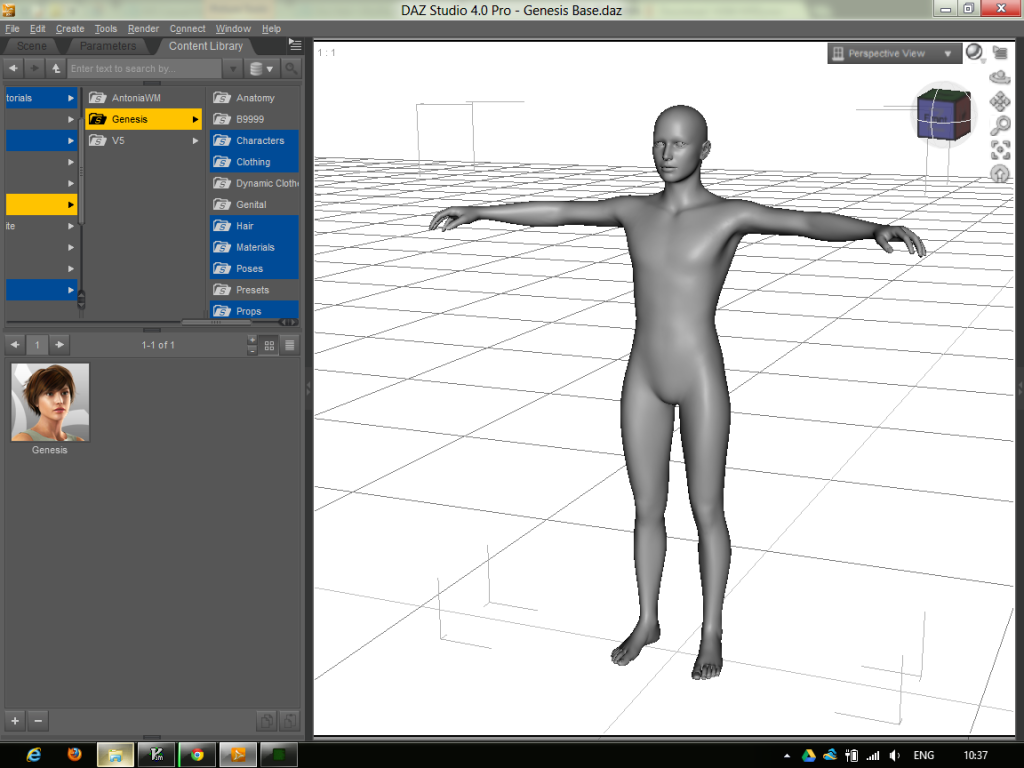
Fire up DAZ Studio Pro and you should see something like this:
Except yours probably won’t look like that, not right away. One of DAZ Studio’s (many) strengths is that the layout and appearance is highly customizable. The default layout is optimized to be newbie-friendly, whereas I favour a layout which gives me more screen space for the 3D view. If you want to try out the different styles and layouts, you can find them in Window->Workspace (which controls the views and placement of the tabs) and Window->Style (sets the overall fonts, colours, etc). I have mine set to a variation on the City Limits workspace, with the Darkside style. How you set your own screen up is, of course, entirely up to you.
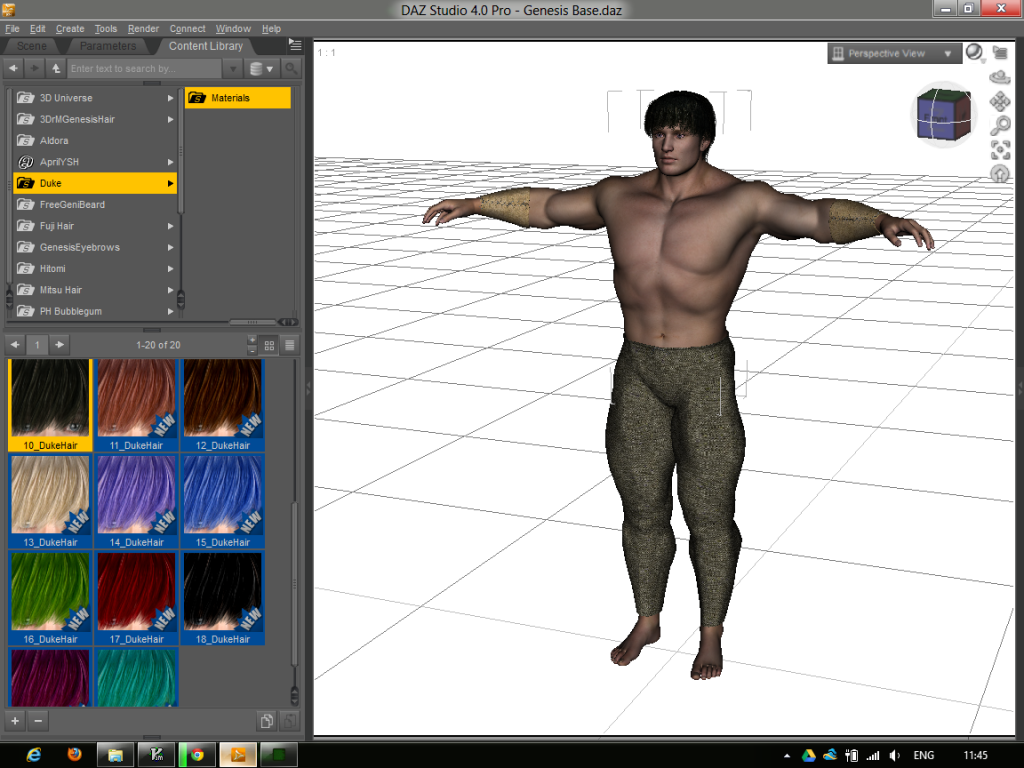
I will be using the Content Library rather than Smart Content throughout as I’m more used to the Content Library way of working. If you can’t see the Content Library tab, go to Window->Tabs and activate it. Drag it someplace conventient (it will auto-stick to the sides) and you’re all set.
The Genesis Base figure loads up by default as an androgynous figure so let’s put some meat on his bones. If you can’t see him in your Scene, go to My Library->People->Genesis in the Content Library and double-click him to load him up.
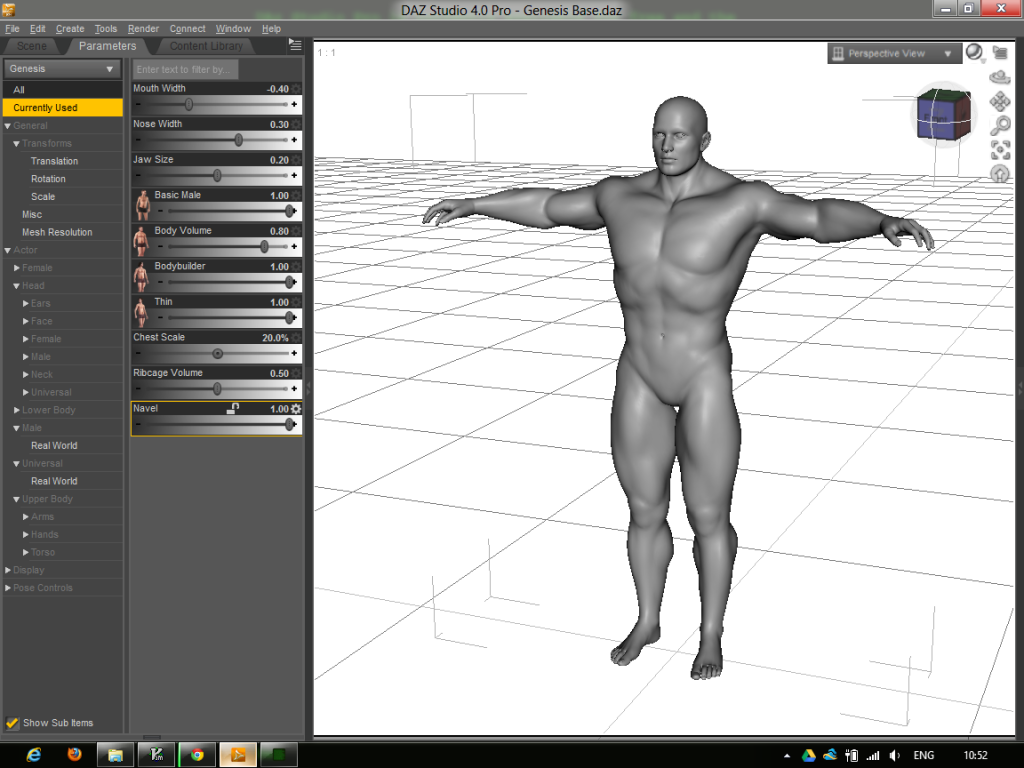
Click on Genesis to make sure he’s selected then go into the Parameters tab (again, if it’s not visible, activate it in Window-Tabs) then open up the Actor list.
Here are the settings I used for my hunk of a barbarian. Feel free to experiment and build your own.
- Male->Basic Male 1.0
- Universal->Body Volume 0.8
- Universal->Bodybuilder 1.0
- Universal->Thin 1.0
- Upper Body->Torso->Chest Scale 20%
- Upper Body->Torso->Ribcage Volume 0.6
- Upper Body->Torso->Navel 1.0
- Head->Face->Mouth Width -0.4
- Head->Face->Nose Width 0.3
- Head->Face->Jaw Size 0.2
Much more Barbarianic. If Barbarianic was a word.
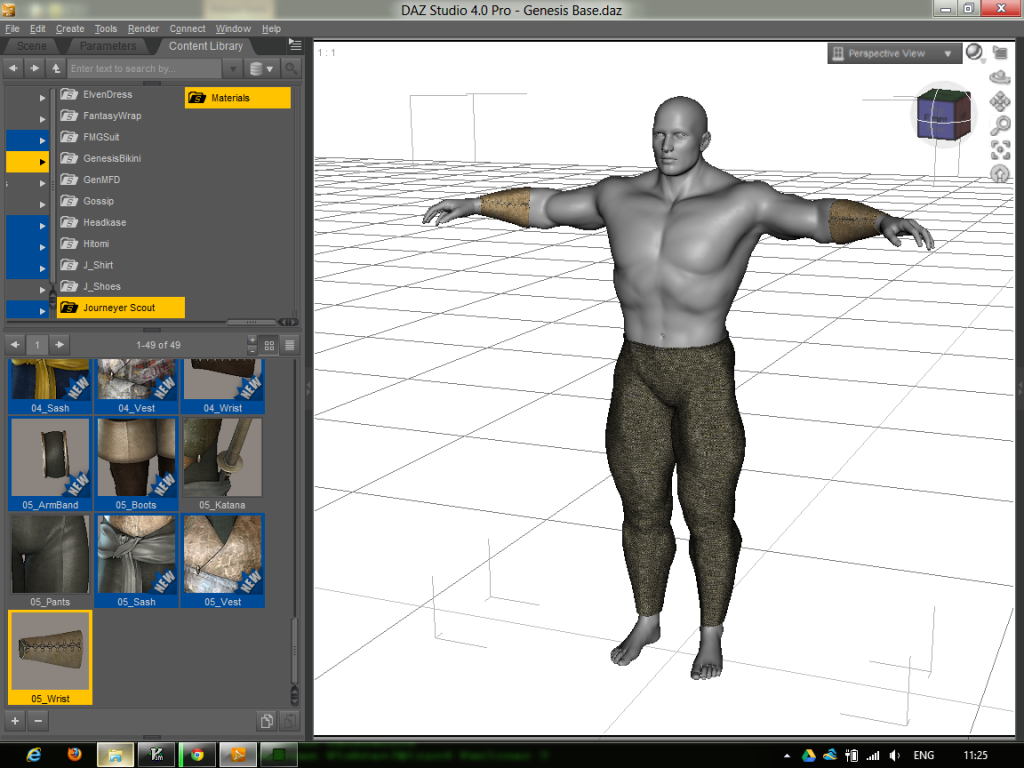
Next head into the Content Library and go to People->Genesis->Clothing->Journeyer Scout. With Genesis still selected, double-click the Pants, Boots and Wristguards. They should conform to the figure automatically. Clever, eh?
Now go into the Materials tab in Journeyer Scout, select the Pants (either in the 3D view, or in the Scene tab) and double-click 05_Pants (or any other material, if your prefer). Next select the Wristguards and set them to 05_Wrist, then choose a Boots texture. You should end up with an image something like this:
Now to give our Barbarian some skin texture. Click on Genesis to make sure he’s selected and go to People->Genesis->Materials and double-click Sample Jeremy – No Gen. Marvel at his lack of nipples. If that bothers you, use a different texture or cover him up :)
Now for Hair. Go to People->Genesis->Hair->Duke Hair and double-click it. Choose a Material to set the colour how you want.
Go into People->Genesis->Poses and choose a suitable pose (the one I used is in Basic Male) and move the camera until you find a pleasing position using the camera controls to the top-right of the 3D View. While you’re there, click the topmost button (the one which looks like a mini-menu) to open up a mini-menu and change the background colour to black. You’ll see why in a mo’.
Double-click Genesis’ Head and to into the Parameter tab to set an expression. I used Angry 1.0 and Mouth Open Wide 0.7.
Now is a good time to do a quick test render. In the top menu, go to Render->Render Settings and set the render size to Square, 800×800 pixels. Press CTRL-R, and bask in your own awesomeness.
The default lighting in DAZ Studio is designed for preview use only, so let’s make it better. In the top menu, go to Create->New Distant Light and in the Parameters tab set the Light Intensity to 25%. This is going to be our overall fill light which puts a small amount of light into the shadows to give them detail. Without it, out shadows would be completely black.
Now add a Spolight by going to Create->New Spotlight. With that selected (use the Scene tab to select it, if necessary) use the Parameters tad to set the following:
- General->X Translate: -100
- General-> Y Translate: 250
- General-> X Rotate: -90
- General->Z Rotate: 45
- Shadow->Shadow Type: Deep Shadow Mat
- Shadow->Shadow Softness: 50%
- Light->Intensity: 75%
- Light->Spread Angle: 90
This should set the light to cast on the figure from above with pleasing (but not too deep) shadows.
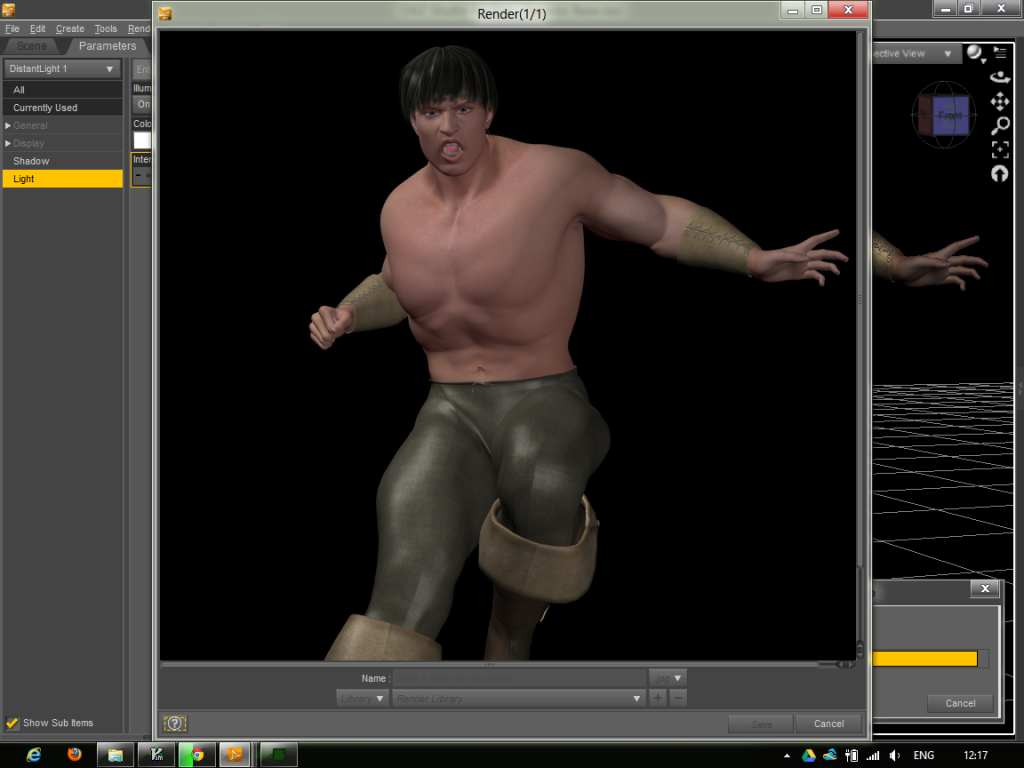
Now hit render, and you should be an improvement in the overall appearance of the scene, all with just two lights.
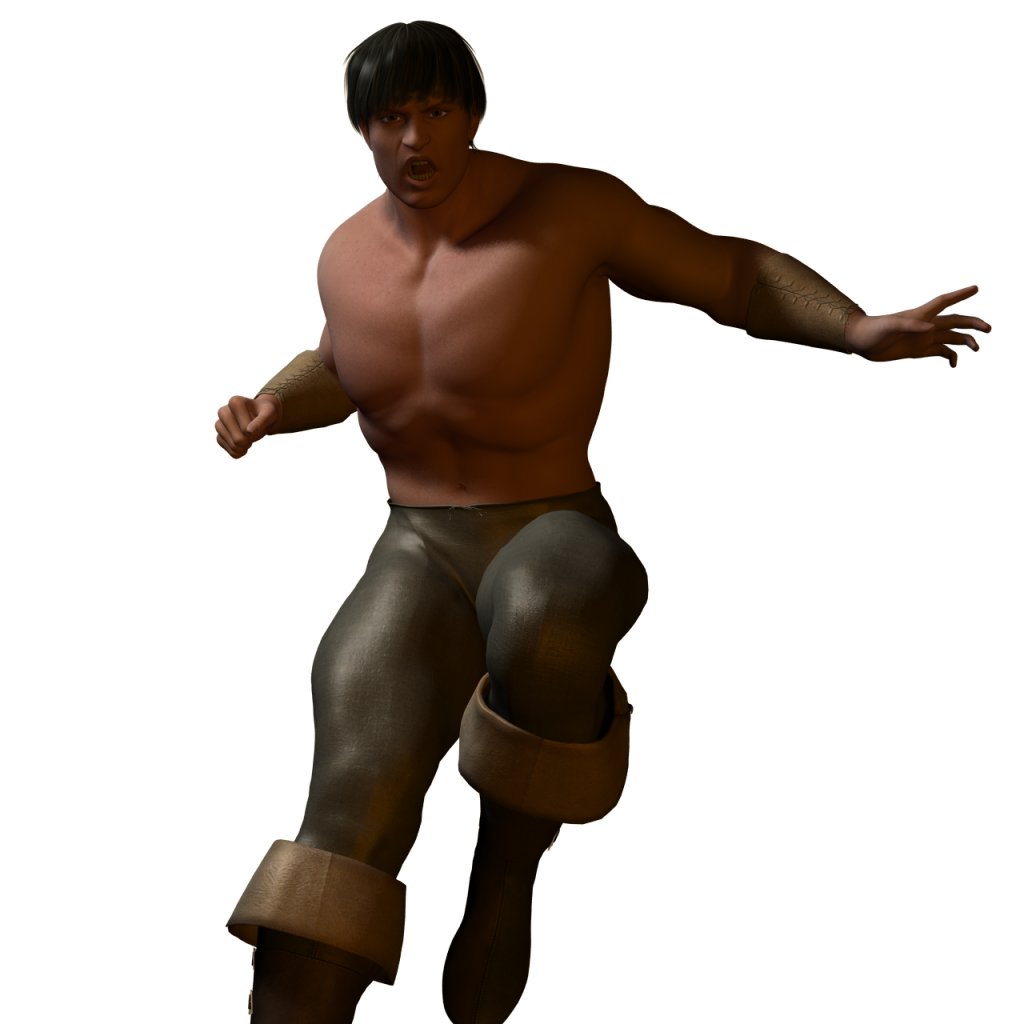
Go into the Render Settings, raise the Render size to 1280×1280, and Render one last time. Save the image in .png format. This will export it with a transparent background. We set the background to black earlier to ensure there will be no “glowing” pixels around the edge. This is a Golden Rule – if you are going to add a background in another application (as we will do here), always render it with a black background in DAZ Studio and save it as a .png file. It saves no end of headaches later.
Black background becomes transparent, but with nice crisp edges. See?
And we’re done in DAZ Studio. Next time, we will use Photoshop to add a background and some water, then load the image into Pixlr Express for some final postwork and tune-up.
Till then!



Great start!
It may be stuff I know, but it’s always good to know I’m not missing some vital step. Part 2 looks like it will have all kinds of new goodies for me to try.
Thanks!
So…………..part 2? :-)
Pwease?
Coming this week! :)
Looking forward to it.
My post work skills are lagging way behind my 3D skills woefully.
I can only learn so many programs in one lifetime.
Week’s almost over, GW. :-)
**bites nails**
**stares at bleeding fingertips**
*whimper*
Sorry! It is coming, but tutorials unfortunately take a lot of time to create, and I lost all of my screenshots and notes after a data wipe (silly me forgot to save the folder).
Soon :)
I dont know what I am doing wrong but the clothing I apply will not fit the Genesis actor I followed your tutorial but it dont work I reinstalled daz 4 pro still same problem any help appreciated.