A short while back I posted an image titled Stand Your Ground, and promised a tutorial showing how it was made. This is it.
Note: This tutorial contains nudity. Underneath your clothes, so do you. Live with it, or look away now.
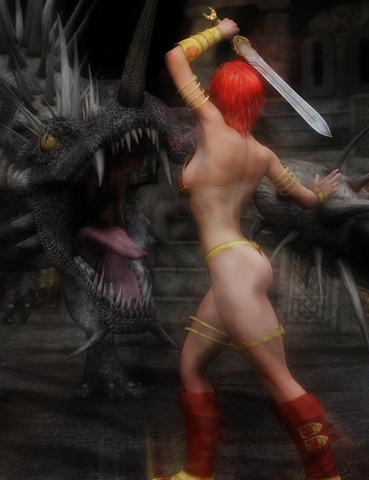
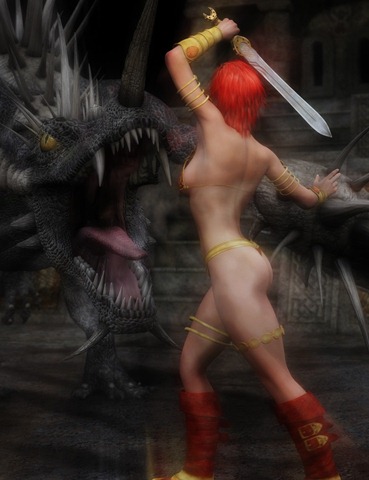
Starting (as you do) at the end, here’s what the finished result looked like:
This is made from two renders of the same scene with different lighting, plus a third layer added in Photoshop to provide the “roaring dragon” effect.
When it comes to setting up a scene in DAZ Studio, I usually start with the figure and try to get the general body and head shape right before working out to the clothing, other characters and surrounding scenery. For this render I wanted a female warrior who was lithe and clearly muscled but not too strong – she’s no Amazonian. She is Stephanie 4 Base (my favourite starting female figure right now) using the Natalie morph and a touch of She-Freak added for muscle definition.
That’s one thing I love about working with the Unimesh figures – I can mix and match between such very different character morphs to create exactly the look I want. The skin texture is simply Stephanie’s own default; it’s that good I felt no real need to change it for anything else.
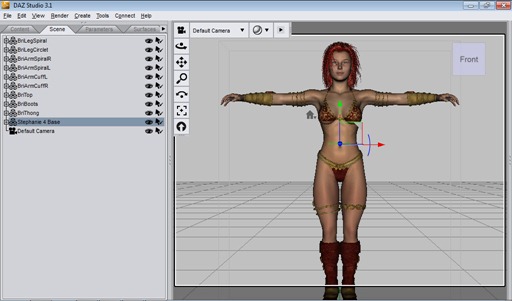
The clothes are from the Briana Culaith set. If I was using Poser, that would immediately pose (no pun intended) a problem, as this set doesn’t have fit morphs for either Stephanie or She-Freak, and I’ve used both. I’ve have to set about tweaking, scaling and adjusting the clothing to fit by hand, or rely on third party tools or magnet to do the job.
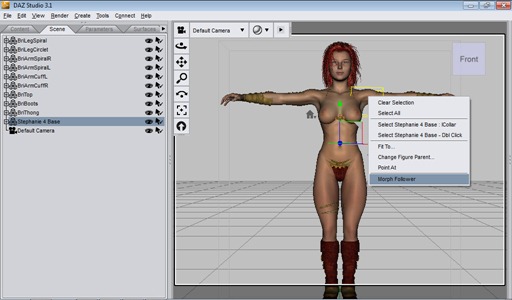
In DAZ Studio however, it’s simply a matter of selecting Stephanie, right-clicking on her in the Preview window and hitting “Morph Follower”.
This is one of the best features ever added to DAZ Studio, ever. Any clothing (no matter how old) will “just work” with any new Unimesh morph set, right away. There’s no updating of the clothes to be done by the vendors to suit the new meshes, no mess, and no fuss. Right-click, Morph Follower, done.
For her hair, I used Aether Hair. It is easily one of the best hair models around and comes with fits for Victoria 4, Michael 4 and pretty much any figure ever made. There’s a tonne of style morphs included too so it’s a one-stop hair whether you want to render something short and cropped or savage and untamed. It’s my most-used hair of all the ones that live in my Runtime folder, by a mile.
The rest of the scene is simple. Take one Spiky Dragon and add one Briana’s Temple in the background. Add salt to taste, and apply Depth of Field. Now for the lighting.
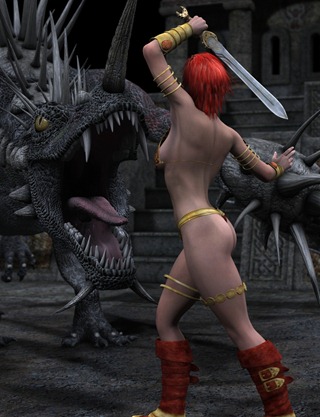
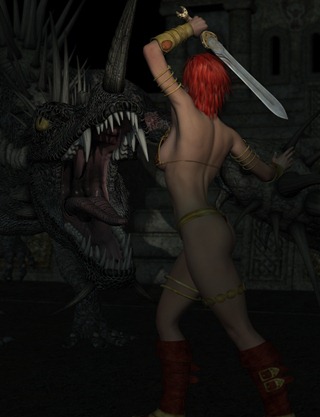
My favourite light set is good old Light Dome Pro – not the second (which produces excellent results but the render times can take ages) but the first. As far as lightsets go it’s dirt cheap ($20) and delivers consistently excellent results every time. Often (as with this render) I just used the Cloudy/Draft setting and work from there. This keeps the render times well under an hour. Here’s how the render looked on first pass:
That’s good, but it lacks focus. The light is too even. The eye sometimes needs patches of light and dark to give it something to latch on to. I delete the lights and add a low-intensity Distant Light and a single shadow casting Spotlight to pick out the dragon’s teeth and the warrior’s left side:
See how your eyes know where to look now? By combining the two images in Photoshop with the first image as Layer 1 and the second as Layer 2 set to Lighten, we’re more than halfway there. Of course, I could have just added a Spotlight into the scene with in DAZ Studio with the existing lights, but where’s the fun in that? Rendering two scenes with different lighting and blending the layers in Photoshop can produce some great effects! And some, not so good, but it pays to experiment.
Next, I take a copy of the bottom Layer and drag it to the top, covering all of the others. Head into Filter->Blur->Radial Blur. Set it to 10 Pixels, Spin, Good Quality and set the Blur Center to roughly where the Dragon’s open mouth is on the scene. Drop Opacity to around 55%.
We’re almost done. To make the renders really jump off the screen, I use the Painted Look Actions in Photoshop. These boosts saturation and shadows in a way that would make Frank Frazetta proud. One quick click of the Underpainted action, and the image is complete.
All told, I’d guess this image took about 30 minutes to set up, 30 to render (twice) and another 30 in Photoshop. 90 minutes from start to finish is unusual for me – many renders can take 4 hours or more just to “look right” before I even start to render.
In this case though, it all came together just right. I like it when that happens.
Till next time!



Very, very good. By the way, my review of the PHB is up on RPG.net. And you know what? It still generates controversy after what . . . 2 years of publication? http://www.rpg.net/reviews/archive/14/14882.phtml
You’re taking me to the dark side…
I’m getting closer and closer to experimenting with DAZ.
The water seems just a bit too cold, still. Maybe I’ll cannonball it.
-Tourq
Jump right in. The water is lovely!
I went to the DAZ3D website, and noticed the free version has Advanced features disabled after 30 days. That is, unless you pay ~$150. Do you use the free version, or the Advanced?
I have DAZ Studio Advanced. It does add some very nice extra features over the Free version, but nothing I would call absolutely necessary to be able to turn out darned fine renders. About 95% of the renders I make could can be created using DAZ Studio, free edition, right out the box.
Unlike many apps which use the word “free” when they really mean “crippled”, DAZ Studio is the real deal. With the free version you can create renders up to 12,000 x 12,000 pixels in size (same as the Advanced version), there’s no watermarking and you can save files and import models without restriction.
When you install DAZ Studio free, it asks you if you want to activate the Advanced features to try them out for 30 days. That’s great if you’re considering buying Advanced at a later date and want to try it out. If you’re just getting started with the hobby though, you’ll have more than enough to play with in the free version :)
Hope that helps!
Ja, that definitely does help! Thanks =)
Glad to find your tut pages. I’ve found lashings of Poser tuts out there, but not nearly as many for DS. Many thanks and keep it up.
While I was checking out the various models you referenced, I came across a nice set of rapiers; free this week.
http://www.daz3d.com/i/3d-models/-/rapiers-of-legend?item=10475&spmeta=ab&_m=d
What is the maximum number of figures ie M4/V4 that you could use in a render?
On my little netbook, it gets painful to work with more than three M4 or V4 figures on a scene, especially if using morphs (such as Morphs++) or detailed textures on them. A more powerful computer can easily handle much more figures than that, of course.
For more crowded scenes though, it’s usually better to use M4/V4 for the key figures and lower resolution figures for the background. Figures such as Loretta Lorez or the Lorez Males are tailor-made for large scenes. Even on my netbook I can work with 20 to 30 of them in a scene without breaking sweat.