Here’s a quick show’n’tell for DAZ Studio 3.
But first, the setup. I’m using Vicky 4.2 with the Morphs++ pack, the 3Dream’s free Boy Hair, RecieCup’s free Doll character & textures and the Sports Bra and Shorts (included with DAZ Studio 3), so y’all should be able to follow along just fine. If you don’t have the Morphs++ pack you won’t be able to use Doll’s morphs, but otherwise you’re good to go.
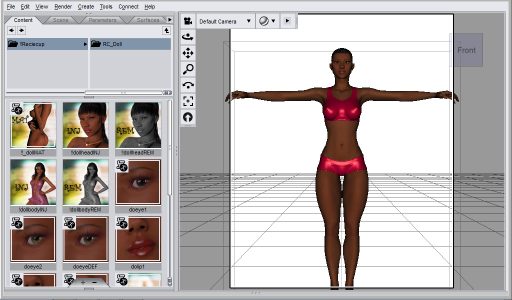
Load in Vicky 4.2 with the morphs, add the clothes & hair and apply the Doll texture & morphs. You should have something which looks like this:
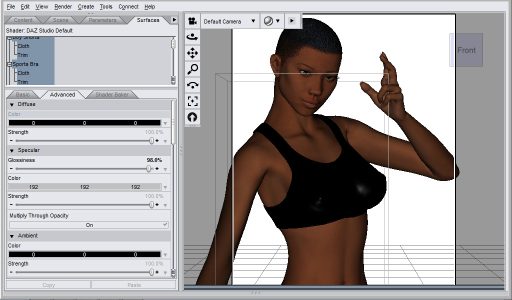
In Render->Settings, the dimensions are set to Custom, 640×800. Time to pose Vicky and adjust the camera position. For this setup I used one of the poses included with the (free!) Girl 4 Base. Select the Default Camera in the Scene tab, set the focal length to 180mm and position to suit. I set the SportBra’s ClothThickness (in the Parameters tab) to 1, and adjusted the Cloth and Trim materials in the Surfaces tab to Black with a light grey Specular shade.
Now for the UberEnvironment2 magic. In the Content tab, go to DAZ Built-in Content->Lights->UberEnvironment2 and double-click !UberEnvironment2 Base. Go into the Scene tab and select it, then hop right back over to the Content tab again. Click on Set HDR KHPark then Set Quality 3Hi. In the Parameters tab, change Occlusion Samples from 64 to 128. This will slightly increase the rendertime, but increate the quality dramatically.
See how a backdrop appeared when you set the UberEnvironment to Park? By default it’s set to be invisible when you render, but if you like it (or are feeling lazy and don’t want to add a background scene of your own), you can make it visible by clicking on the little + next to the UberEnvironment in the Scene tab, selecting EnvironmentSphere then settting Visible in Render to On in the Parameters tab.
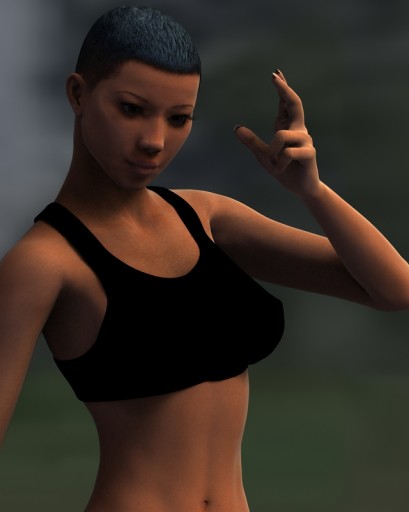
Hit CRTL-R, and………..
Even though a scene like this is quick to set up (honestly, it took me much longer to explain than it did to build), consider setting up couple of default scenes – one for Victoria, and one for Michael – with your most commonly used morphs (Morphs++, Aiko, FREAK or whatever) in place, UberEnvironment all set up and the camera in position. This will shave a lot of time off your workflow and help deliver consistently great results. But don’t tell anyone I said that, ok?
In summary
- Set the camera’s Focal Length to 180-200mm for 3/4 shots, 300mm for head shots
- UberEnvironment Quality Hi and Occlusion Samples upped to 128 is a great compromise between quality and render speed
- Hair kills render speed when using UberEnvironment. If necessary, turn the Shadows off for the hair, or consider investing in the Uber Hair shaders. These let you turn off Ambient Occusion for just the hair – a great time saver!
- If you want an outdoor look to your lighting, use the HDR Park setting
- Once you’re used to this setting, look at ways to break it. Add other lights, drop in a full backdrop and use Depth of Field, experiment with camera angles. It is your render, after all, and there’s no such thing as wrong
Till next time!



I’ve never heard of this tool before, but it seems like it would be a great way for teachers to demonstrate photography concepts.
Indeed it is. I first began using DAZ Studio (and Poser before that) to complement my photography, using it to set up sample light sets and poses for studio reference.
You can find out more about DAZ Studio and download it for free (not restricted in any way) right here. Any questions, just ask!