Depth of Field, how I love thee. For those that don’t know, this is the photographic term meaning the parts of an image that are sharp and in focus; anything else is blurred out to some degree. But that doesn’t make it sound exciting at all, does it? So, let’s start again.
Depth of Field is that magical zing that takes a flat image and turns it into something three dimensional. It’s the cue that tells our minds where to look and what is important in the image. Movie directors use it all the time so we can follow the action. Yes folks, Hollywood can control your eyes and thus your mind! You have been warned.
For 3d render work all too often it’s not used at all which is why so many computer-generated images look like…. well, computer-generated images. Depth of Field giveth Realism, and lack of Depth of Field taketh it away.
When it comes to DAZ Studio, using Depth of Field in your renders used to be pretty darned tricky – it involved messing about with Null objects and lots of guesswork. Then along came the frankly awesome ahRenderControl plugin which made using DoF super-simple in DAZ Studio 2.3. I covered how to use this in some detail, right here.
Now, we’re up to DAZ Studio 3 (with version 3.1 just around the corner, it seems) and Depth of Field is easier still, built right into the program. Here’s how.
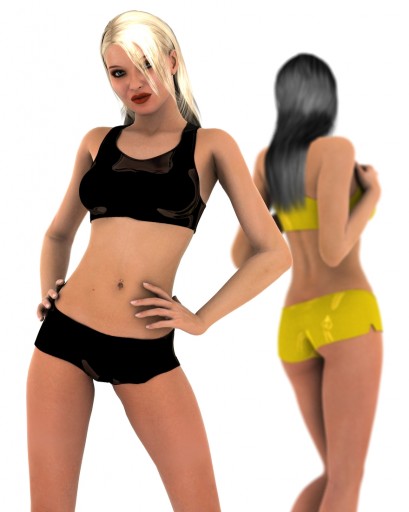
Let’s start with a simple enough setup that anyone can make and follow along. Here’s a couple of Victorias with Glamour Hair and wearing Sports Top and Shorts. These are all included content with DAZ Studio, so we’re good to go. I’ve used the Super Shiny Shaders on the clothes and the Bijou texture for the skin (an excellent skin texture, morph and hair pack, btw – watch out for it on Fast Grab and if it appears, get it!), but any skin texture or morph is good for this.
Vicky One is at 0,0,0 while Vicky Two is at -60,0,-100, slightly back and to the right. I’ve set the Default Camera’s Focal Length to 105 and moved it slightly to frame the two of them neatly. Now for the clever bit.
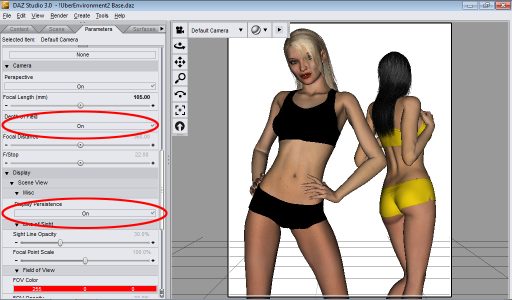
Select the Default Camera in the Scene tab, then head into Parameters. Set both Depth of Field and Display Persistence to ON.
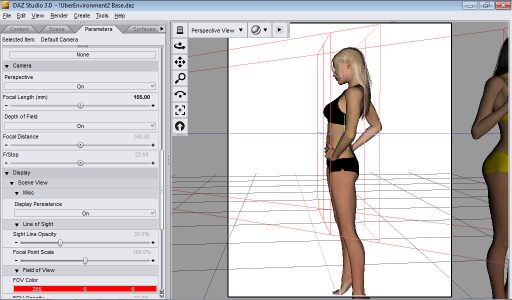
Now, with the Default Camera still selected, change the camera you’re looking through (drop-down in the top-left of your viewport) to Perspective View and move the camera around. Lines show the Default Camera’s field of view, and a guiding box shows the Depth of Field! Change the Focal Distance to move the DoF forward and back, and the F/Stop to widen or narrow it. You can immediately see what’s going to be sharp, and anything else is blurred to a lesser or greater degree (depending on distance from the “in-focus” part). Easy, eh?
This is a pretty extreme example, but it’s well worth using DoF for all your renders. Set the F/Stop to a suitably wide value (for the photographically minded, a value of 22 = f1/2.2, 56 = f1/5.6, 80 = f1/8 etc, by my reckoning) so that the most distant elements have a touch of bluriness, and you’ll see a huge difference in the way your renders pop.
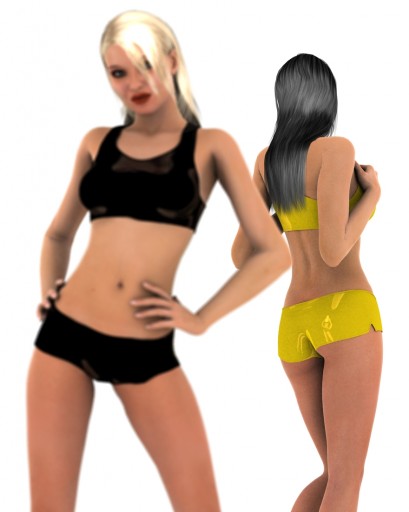
Same setup, but with the Focal Distance changed from 360 to 480 to put the back figure in focus instead. Ok it’s not going to win any prizes, but I like it!
When it comes to your Render->Render Settings->Advanced parameters, the main thing to remember is to set Shading Rate to 0.2, and leave it there. Don’t touch that dial ever again! The default value of 1.00 is much too high, and makes the out of focus elements look oddly pixelated. Set it to 0.2 for a much smoother effect, then forget about it.
There’s on last part to recreating this images, and that’s the lighting. I used nothing more than the included UberEnvironment2, and I’ll show you how to use that lovely light setup in DAZ Studio 3 – next time.
Till then!




Depth of Field, that easy? :)
.-= EltonJ´s last blog ..Tribes of the Wilderlands: The Telosians =-.
au contraire, you win the no-prize!
Thanks so much for posting this– since I started reading your blog, I’ve learned about so many nifty features and how to use them I hardly know what to do!
(I’ll admit I wish I could find a copy of DS2 so I could try some of the older stuff, like RenderControl (which I want because my slow computer handles complex lighting poorly) and the jlgShaders, too, but I’m getting by.)
Anyway, thanks for shedding some light and sharing your very cool things.
@Demonezade Thanks! More tutorials (starting with one detailing how to get the best out of UberEnvironment2 lighting) coming soon. If there’s anything else you’d like me to cover, just let me know.
I’ll try to hunt down a link to the latest DAZ Studio 2 build for you – I’m surprised DAZ3d dropped it off their website.
@Greywulf– actually, since you asked, having discovered the UberEnvironment lighting, I would love to know if there is a way to use the “tube” light effect for a smaller lightsource– like a lightsaber blade. I’ve tried a bit, but without much success, and I’m not sure which settings to fiddle in what direction to improve it.
I am also curious to see what you’d do with a fog box:
http://forum.daz3d.com/viewtopic.php?t=70013
@Demonezade the Uber Strip light sounds like it should be a shoe-in for all your light-saber needs doesn’t it? Unfortunately it isn’t though, for several reasons:
1) It’s hard edged, and there’s nothing you can so about that. So, no light sabrish soft fading glow around the edges
2) It’s an UberLight, which means long(-ish) render times. That’s acceptable for all-over light (such as that with UberEnvironment), but for something that should just enhance the lighting of a scene (ie, the typical light-saber glow illuminating the immediate area and nothing else) that’s usually not worth the price. A full-on lightaber battle would run into hundreds of hours-worth of render time, easy. Ick.
3) There are much easier ways to do it.
Tell you what. I’ll show you how in an upcoming tutorial.
And the FogBox is a great thing to use. I’ll show you that too, as you asked :D