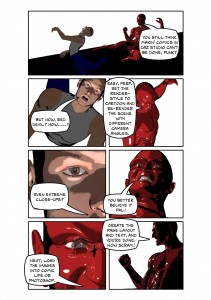
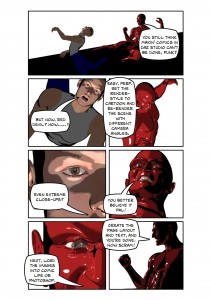
This time around we’re going to try something a little more ambitious – a complete comicbook page created entirely in DAZ Studio and laid out using Comic Life. Here’s an end result, explaining the workflow………
Click to enlarge.
That’s it essentially, in a nutshell. As we’re working in a 3d application, you can just create a single scene and move the camera, re-rendering as you go, making occasional pose alterations as required by the action. This means the workflow is much, much quicker than the “traditional” method of drawing every single panel from scratch – DAZ Studio takes care of all the fiddly lighting, scenery positioning and the rest for you so all you need to do is get those dramatic camera angles. Nice.
Oh, and if you want to see the earlier tutorials to catch up, they’re all tagged tutorial, and you can see them here. Just so you know!
On with the show.
You will need: DAZ Studio, Michael 4 Base, Super Shiny Shaders, M4 Pose Pack 01.
All of those are available for free. Install DAZ Studio and Michael 4 Base as usual. Unzip the Super Shiny Textures and the Pose Pack and copy the files into your /Program Files/DAZ/Studio/content folder.
I used the Michael 4 Morphs++ for the Superhero body shape and expression. This costs $29.95, but is best bought as part of either the M4 Complete Bundle ($49.95), or the Pro Bundle ($99.95 – but currently reduced to $49.98, and that’s including everything in the Complete Bundle too!).
The Devil face morph came from M4 Enhanced ($13.95). This is an excellent morph pack which adds a lot of character and customization to M4. Morphs++ isn’t needed to use it either, but combine the two and you’ve got tons of ways to make every M4-based character unique. I like.
Neither of these are necessary to create your own comicbook layouts (or follow along with this tute) but do greatly increase Michael 4’s versatility. Which is nice.
For the actual page layout, I recommend Comic Life Deluxe ($29.95). It comes with a ton (well, 322) different page template, is ridiculously easy to use and….. well, if just works. And there’s no higher praise than that, in my book. I like things that just work.
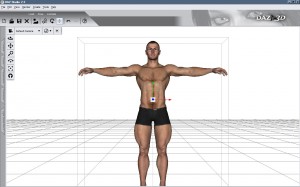
The first thing we need to do is setup a simple scene. Fire up DAZ Studio and load in Michael 4 from Figures->DAZ People. If you have Morphs++ and M4 Enhanced you’ll be asked whether you want to load ’em in too. Put a checkmark in both boxes and Mickey loads into the blank scene.
Note: Adding Morphs to a figure increases their complexity and memory requirements, so if you don’t need ’em for a figure, don’t add ’em. If you do, do.
The first thing to do is configure the Render setings. From the top menu, go to Render->Render settings…. (well, duh) and set the Render style to Cartoon and Dimensions to “Active Viewport”. That’ll do for now.
If you’re using Morphs++ and M4 Enhanced, select Michael 4 and head into the Parameters tab. In there, dive into Morph|Shapes->Morphs++ ->Full Body and set Superhero to 1. Back in the Scenes tab, drill down to Mickey’s Head then hop into the Parameters tab again. In M4 Enhanced – Mina ->M4 Enh ->M4EnhnCharacters set M4EnhSatanic 1 to 100%, and in M4 Enhanced – Mina ->M4 Enh ->M4EnhnEars set M4EnhnElfEars to 100% too. I wouldn’t normally use whole values but mix and match different settings (60% here, 20% there, etc) to get a unique face, but the Satanic face is too good to mess with.
Here’s what we’ve got so far:
It’s Aquaman!
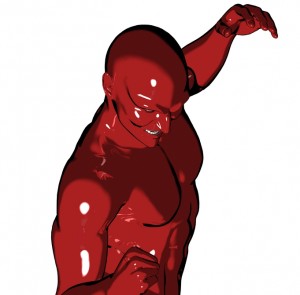
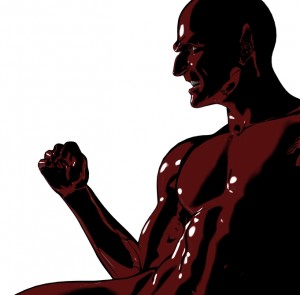
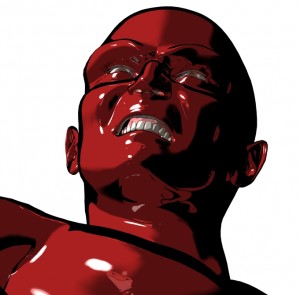
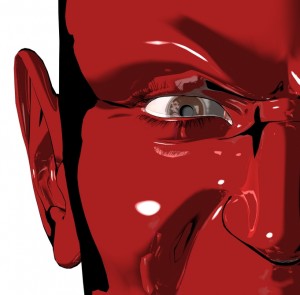
Here’s where we’d normally add clothes, change the skin texture, etc but for the sake of speed and simplicity (and ‘cos Shaders are fun) we’ll just give him an all-over Super Shiny bodysuit. In the Surfaces tab, select the Eyebrow then CTRL-click everything from Lip down to Toenail. That leaves only the eyes and inner mouth parts unselected. Make sure Michael 4 is still selected in the Scenes tab, then in the Content tab to go Studio->Shaders-Super Shine and double-click A2 red. Ooooo! Say hello to Red Devil. ‘Course, if you want another colour that’s fine too, but Purple Devil just doesn’t cut it for me.
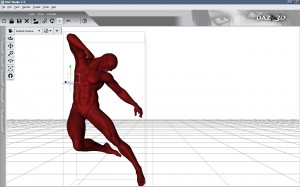
In Pose->M4 ACTION POSES (or M4 ACTION POSES 02, M4 FLIGHT POSES, M3-V4-M4 poses or wherever) choose a suitable action pose such as this………
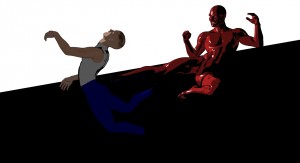
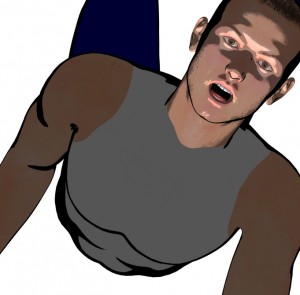
I’ve move Red Devil out the way a touch in the Parameters tab (Xtrans -100, Ytrans 20) because we’re going to give him something to hit – another Michael 4! Load another one in, pose and add clothes, use the Shaders or just fiddle with the colours in the Surfaces tab. Whatever suits. Use X, Y and Z Translate settings in the Parameters tab to get him into position, and hit CTRL-R to render. Here’s one I made earlier, using a scaled, rotated and stretched cube (from the top menu, Create->New Primitive) coloured black as a faux background. For the lighting, I used a single Distant Light and one Spotlight to the left pointing at Red Devil’s face.
That’s the hard work done. Now for the fun part. Using the camera controls in the top right corner of the screen, move the camera around, zooming and rotating it to find all those kewl camera angles. If you find a good one render, save and move on. To start again, hit the little up-arrow in a circle at the bottom of the camera controls to reset it back to the default position.
Quick tip: Hold down the Right mouse button (instead of the left) on the Zoom Camera icon (the magnifying glass) acts like a real camera zoom, getting closer to the action without distortion. That’s great if you want close-up face-shots!
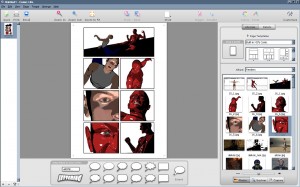
Nearly done! In Comic Life, choose a suitable page template and drop your images into the panes, resizing and positioning as required.
Add text, speech and thought bubbles, then hit File->Export->Export to image(s) and……..
Till next time!




Hi Greywulf!
My name is Paulo and I´m from Brazil (so sorry in advance for any spelling or grammar mistakes, English isn’t my first language).
I’ve found your blog while looking for “Sunless Citadel” in 4e style. I read your September 30 post where do you wrote:
“So anyhow, when we’re back online there’ll be posts like this……….
* Sunless Citadel 4e conversion all done and dusted in a pretty PDF ready to slip into the cover of your adventure and run”
So I looked for the PDF but didn’t find it. Did You finished de conversion? Could you send it to me by e-mail?
I really love “Sunless Citadel” and I want to play it with my group in 4e rules.
Thank you!
Paulo Segundo
Hello Paulo, and thanks for stopping by.
The Sunless Citadel conversion PDF is still on my list of things to do, but it will be up…… soon!
Thanks for the reply man!
I´ll wait for the PDF then. I hope it came by soon!
These first steps in DAZ Studio are very helpful. Thanks for putting them up. :)
Eltons last blog post..Designing your Own Rolemaster Adventure, Part 2
@Elton Glad you like ’em! :D
Hi Greywulf,
In the tutorial you load another Michael into the scene and then edit him from scratch.
Suppose you already had a couple of “template” characters in separate .daz files that you had already tailored. How would you load both characters into a new daz scene to create a render that contains them both?
Thanks,
Andy
@AndyB In DAZ Studio (and Poser too) you can save a complete character including clothing, hair, textures, etc back into your Runtime Library as a ready-to use figure. With the figure selected go to File->Save As->Character Preset and check the items you want saving. From there, you can load the complete figure into any Scene just as you would any other object.
Hope that helps!
Ahh, @AndyB I was just thinking the same thing earlier when I went outside for a computer break. I was going ot ask the question myself once I got thorugh all the tutorials to see if he had answered it or not, and well… THANK YOU.