Let’s build a city!
Dystopia is an utterly wonderful set of props, figures and scenery that, as the name implies, postulates a broken near-future. They have a grimy sci-fi style that’s in keeping with the realms of Cyberpunk, Bladerunner and Shadowrun – but can be turned with a little imagination into anything you want. I’ve used them for everything from fantasy temples and castles, a starport, modern-day cityscapes and more.
The first two packs of City Blocks are available for free here and here. Make sure you get the ones for Poser and not the ones for Lightwave! Each pack contains 10 different city blocks, a skydome, light settings for daytime, cloudy and night-time, several texture options and a few clever bits of trickery to make the whole thing easy to use. Go on. Grab ’em now!
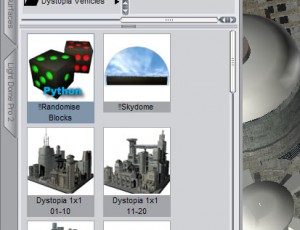
Done that? Good! Once they’re installed, fire up DAZ Studio and head over to Figures->Dystopia->City Blocks.
First things first. That Randomise Blocks thing? Doesn’t work in DAZ Studio, so don’t worry about it; it’s a Poser-only thing. Whilst it’s a nice feature, you won’t miss what you haven’t got. Moving on, there’s the Skydome. Double click that and you get a big hemisphere complete with fluffy clouds and a skyline. Nice! This’ll get plenty of use even if you’re not using the city blocks. There’s textures for a cloudy and night-time sky over in Pose->Dystopia->City Blocks->MATs, and lights to match in Lights->Dystopia->City Blocks too. New lights! Yay! They’re very good quality, and well worth experimenting with for portrait scenes too.
But that’s just icing on the cake. We’re here for the City Blocks, right?
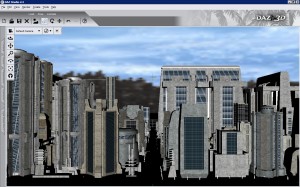
There’s two ways to load your City Blocks into a scene. Either pick one of the pre-constructed 1×1, 2×2, 4×4 or 6×6 setups, or load individual blocks from Props->Dystopia->City Blocks. Which you do depends on how you intend to use them in the scene. If the City Blocks are just background scenery then just use the pre-built setups from the Figures folder. On the other hand, if there’s one specific block you want to use, grab from the Props folder. For now, double-click on the Dystopia 4×4 1-10 figure. This does what it says, loading in a 4×4 grid of figures from the 1-10 content pack.
Too close! Select Dystopia from the Scenes tab, then set Z Trans to -500 in Parameters. you should get something like this.
Now for some fun.
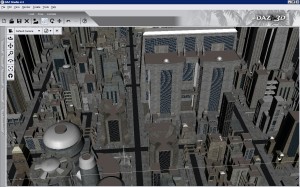
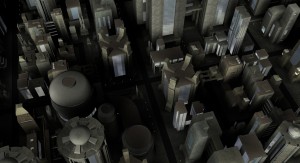
Jiggle the camera around using these two buttons until you get an aerial view you like. Something like this is cool.
Let’s take a quick look at the textures. In Pose->Dystopia->City Blocks->MATs, set the Bump to High and the Windows to Blue. The lower-resolution options are good for more distant scenes, and the Raytraced Windows settings work best if you want real reflections. They take an age to render though, so better to leave them off where you can.
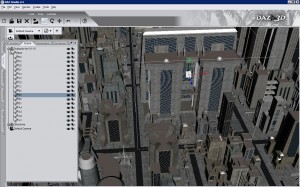
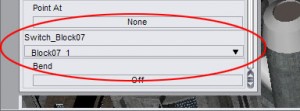
Incidentally, that Randomise Blocks thing? What is allows you to do in Poser is shuffle the city blocks around, randomly creating a new combination of blocks each time you double-click it. We can’t do that in DAZ Studio, but it’s easy enough to change the blocks in a scene. Head over the the Scenes tab and open up Dystopia with the checkboxes until you see this.
Click until you find the block you want to change (it’ll be shown as selected in the main screen), then go into the Parameters tab. In there, use the Switch_Block dropdown to replace the current block with a different one. Easy.
Now for Lights. Go to Lights->Dystopia->City Blocks and choose Blue Sky. Remember that DAZ Studio loads Poser lights with shadows disabled by default, so let’s turn ’em back on. In the Scenes tab, select the last light then hold down SHIFT and press up twice to select all three at the same time. In the Parameters tab, set Shadow Type to Deep Shadow Map, and Shadow Softness to 80%. Press CTRL-R to Render.
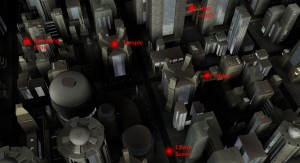
Once you’ve got a pretty city pic of your own, I’m sure that just like a movie location scout you’ll see places in the scenery you want to explore. Perhaps there’s a rooftop that’s perfect for your brooding hero, or a skyscraper walkway that’s just asking for a fight scene. Maybe there’s a roadway tailor-made for car chases or a building that’ll look great as a fantasy temple. Make a note of these locations either on a printout or on a layer in Photoshop, and use ’em time and again. It’s your city, after all.
Finally, restore the camera to the default position (last button in the camera-manipulation controls) and load in Victora 4. OMG! Land of giants! What happened?!
The Dystopia model set loads by default at a very small size so that you can just drop an object close to the camera, and (thanks to faux perspective) it looks like there’s distance between it and the city scene. This is great for space-ship renders or images of superheroes flying “high” above a city, but less useful if you want to place objects in the city. There’s where the scale controls in Pose->Dystopia->City Blocks come into play………. but we’ll save those for next time!
Enjoy.




New to Daz how do I add more than one dytop[ia model?
Go into Props->Dystopia->City Blocks and double click whichever one(s) you want to add to the scene.
They all automatically load in the same place (known as 0,0,0 – the centre of the scene) so you’ll need to move them so they don’t overlap. Select one in the Scenes tab, then head into Parameters and change the Z Translate value (to move it forward or back) and X Translate (to move it left and right).
Hope that helps!
got it thanks, I am doing all of the steps but I dont get the cool shadows you get at the end. Could it be one of my settings?
Double check that you set the lights to create shadows. In DAZ Studio, they’re set to “Off” by default:
> Now for Lights. Go to Lights->Dystopia->City Blocks and choose Blue Sky. Remember that DAZ Studio loads Poser lights with shadows disabled by default, so let’s turn ‘em back on. In the Scenes tab, select the last light then hold down SHIFT and press up twice to select all three at the same time. In the Parameters tab, set Shadow Type to Deep Shadow Map, and Shadow Softness to 80%. Press CTRL-R to Render.
That should fix it.
Hey greywulf. Great guide there :) Now I’ve just come across a huge problem.. The sky thingie has worked fine for me all day. But just now I tried using it again, but it just comes up with a huge dome of greyness.. I tried redownloading it from daz3d but it didn’t seem to fix it. Do u got any suggestions?
Ooh nevermind my last comment. When I had gotten some sleep and my PC was off it seems to have fixed itself :P Great tutorial and keep up the good work mate! I’m starting to get the hang of this stuff :D Best guides on the internet :D
I installed it, but I cant find it anywhere in the Daz 4? What did I do wrong?
Go to Windows->Tabs and make sure you have the Content Library ticked and showing. If you’re using one of the default layouts for DS4, it might not be.
Inside the Content Library, go to Poser Formats->My Library->Figures->Dystopia->City Blocks and you should find them there and follow along with the rest of my post.
Hope that helps!
Figured it out. I have to install it the library folder of my Daz 3d library. Thank you for the quick response.
I know I am way late to the party but I’m having a heck of a time figuring out how to apply the mats to get the night time windows. Nothing seems to work. Any clues?
I’m super late. I don’t even think you can get dystopia for free..I went where you told me to go and got a 404 error.No sky dome for me
That’s o.k. I’m having a hard enough time trying to figure out how to load 3rd party content.Until l found this place i was totally lost,but after reading
Greywulfs post I think I know what to do.Think I may wait till morning have been at this all day,Ahhh unemployment
Hi, Ray,
The free City Blocks have indeed moved location – you can now find the first set at http://www.daz3d.com/dystopia-city-blocks-001-010-poser The second set is now sadly unavailable for Poser/DAZ Studio, but the first contains more than enough to get you started (including the sky dome).
I hope you have fun!
Ya know it’s weird but right after i posted that I went to DAZs site to check on an order and I decided to check out the Dystopia stuff just to see what it would cost…I clicked on the city block 1-10 and even though there is a price there after you click and go to the description the price read $0.00…so of course I ordered it..Here’s the goof part I decided to check the rest out and also got blocks 11-20 for $0.00 and also the console station for…yup $0.00 I ordered all three!,As far as I know as of 1/2 hr ago they were still free just go to DAZ3D,com go to shopping and type in Dystopia in the search parameter all the Dystopia stuff pulls up and then just look for blocks 1-10 and 11-20.just be carefull you want the ones for DAZ/Poser with the full screen descriptions not the ones labeled city in a box,Those are the lightwave editions.Ignore the price click on the description and you’re in.Enjoy!Now i have to figure them all out in between modeling my Genesis character and figuring out how to load 3rd party content…Have fun folks…raykat