Let’s talk Lighting. I’ve said before that Light is Everything, and in Let There Be Light wrote about how to use light to create different moods and set the feel of a scene. In The Steam Room I talked about how light diffuses and bounces, and in The Colour of Light about….. uhhhh…. the colour of light. These tutorials were written for Poser, but apply equally well to DAZ Studio. Or any other render app, for that matter.
Rather than repeat myself, go and take a look at those posts to see why Light is all important, how you can use it to terrific effect, and why you have to. Light isn’t just everything – it’s everything important about an image. I’ll wait while you catch up.
That’s the theory done. This time around we’re you go look at how you use and manipulate lights in DAZ Studio. Ready? Let’s go.
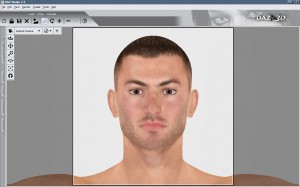
Fire up DAZ Studio, then load in Michael 4 (Figures->DAZ People) and the orange swirly backcloth (Figures->Environment), then make it plain white (Surfaces tab, set Cyc’s texture to None, remember?). All will become clear why we’re going to use that white backcloth, Soon.
I’ve set my render dimensions to square, 800×800 and render in a new window from the Render->Render settings….. dialog box, then selected the Default Camera in the Scenes tab. In the Parameters tab, set Focal Length to 300mm, Y Translate 170 to and Z Translate to 280.
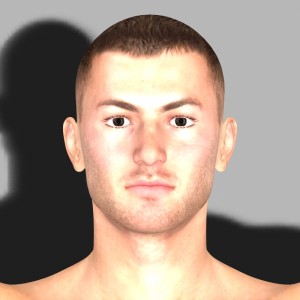
Seriously, this all takes longer to explain than it does to do. You should get something like this.
If you look in the Scenes tab you’ll see that there’s just three things in the scene – the camera, Michael and the backcloth. So where’s the light coming from? That’s one of life’s philosophical questions, and the answer is that DAZ Studio rather confusingly (but conveniently) has a default “if there’s no lights, use this” lightset which provides basic illumination if there’s no other lighting in the scene. Just don’t think about the “absence of light creating light” thing too much, ok?
From the top menu, select Create->New Spotlight, and accept the default name. Suddenly, the scene gets…. darker. Yeh, that makes sense. Like I said, don’t think about it too much. Adding any lights (even just a lowly spotlight) replaces the default set. DAZ Studio supports three different kinds of light: the Spotlight we’re going to use now, Point Lights, and Distant Lights. Spotlights (as the name suggests) are directional, so you can point ’em at things. Point lights act like a candle or lightbulb in that they illuminate evenly in every direction, and Distant Lights affect the entire scene like the sun or high ceiling lights. Got that? Good.
Most scenes will use a combination of all three. For this tutorial though we’re just going to use a single lowly Spotlight, because you can have a LOT of fun with just the one light. Ask any photographer.
Any light in DAZ Studio works just like any other object, except that it’s invisible, and it glows. By that I mean that you can select your lights in the Scenes tab, and move ‘n’ manipulate them in the Parameters tab, so let’s do that right now.
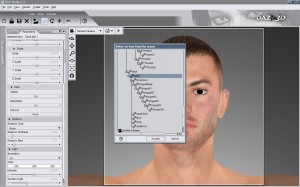
Select Spotlight1 in the Scenes tab, and….. you’re ahead of me, right? Before we play with the Translate values, let’s point that Spotlight at something. Select Point At, then scroll down the dialog box and choose Michael’s Head.
Now, play with the X, Y and Z Translate dials, and watch as the light changes on the scene. Setting Z Translate to a positive value brings the light forward in the scene. You’ll probably want to do that first. As usual, Y Translate moves the light up and down, and X Translate moves it left and right. When you’ve done experimenting, set X Translate to 20, Y Translate to 180 and Z Translate to 150, then hit Render.
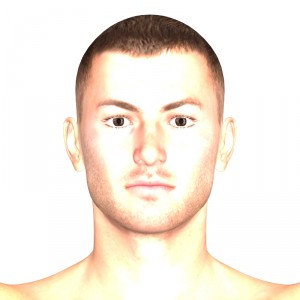
Wow! Too close! Skin on fire! Ow! Ow! Ow! Just as in Real Life, that’s what happens if you have the light too close to the subject, and it’s the Number One mistake folks make with their lighting. There’s two ways to fix this – either move the light further away, or dial down the Intensity. Let’s do both. Set the X Translate to 30, Y Translate to 160, Z Translate to 500, and Intensity to 60%. Render again.
Better, but it’s still a touch too bright, and something is missing. Shadows. By default DAZ Studio doesn’t add Shadows to lights, for two reasons. Firstly, it dramatically speeds up rendertime if there’s no fiddly Shadows to calculate, but also in many scenes they’re not needed at all. For example, in a well-lit room or outdoors scene there’s few shadows worth mentioning, so it’s quicker and easier not to apply Shadows at all. Look too closely and something might look “off”, but it’s good enough 90% of the time.
Me, I prefer to work without Shadows enabled until the final Render, then turn ’em on (and fine-tune) as required right at the end. This gives me quick Renders while I’m working, then Shadows on the final run.
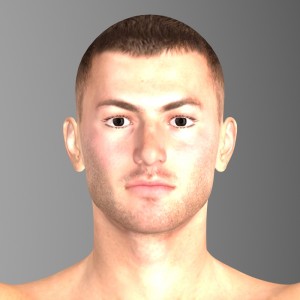
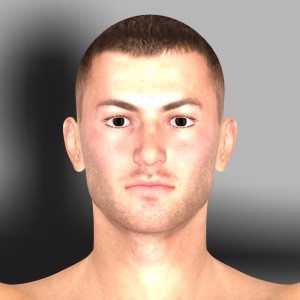
As there’s just a single light in the image and no complicated objects (trees are hell when it somes to shadows – all those leaves!) let’s turn the Shadows on for this Scene. With the Spotlight selected, go into the Parameters tab and set the Shadow Type to Deep Shadow Map, Shadow Softness 10%, then hit Render again. DAZ Studio will calculate all the Shadows first, then Render the image. A Scene with lots of lights can take some time, especially if they all cast shadows!
The shadow we get is a very “hard” one with definite edges. That’s controlled by the Shadow Softness dial. I Usually set that between 40% and 80%, depending on how much of an impact I want the shadows to make. Here’s the same render with it set to 80%.
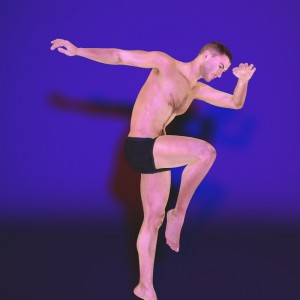
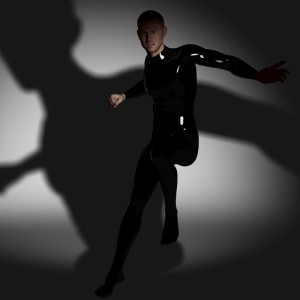
Finally, we can change the colour of the Spotlight. That’s done in the Parameters tab, under Illumination. For this example I’ve set this Spotlight to blue, added another one and set it to red (to balance out Michael’s skintone) then reset the Default Camera and added a silly pose.
Now d’you see why I like “white” backcloths?
Till next time, Happy Rendering!



I haven’t commented much on these tutorials, because I haven’t been actually doing them. My computer is seriously balky with DAZ. Not sure why – I think I’ve just reached that point where too much crap is installed on my computer. However, I am reading them, and they really make my fingers itch. There will be a time . . .
Thanks a heap, man. I’ve been having a really hard time with this DAZ thing, but your pages are a huge help, both with the information and the plain, not too technical language. :)
Keep it up!
@Trav Thanks! Glad you like ’em. If you’ve any suggestions or requests for further tutorials, just let me know.