We’ve looked at how to add figures and clothing to DAZ Studio, and how to use the Parameters tab to control their placement. This time we’re going to put it all together to create a complete scene from start to finish. If you want to pick up the earlier tutorials they’re all available right here.
This scene is something of a Rite of Passage. Pretty much every single DAZ Studio user I know cut their teeth creating a scene much like this one. I know I did. The main reason why is because everything you need to create it is 100% free! Consider this your initiation test, young Jedi.
Here’s what you need:
- A copy of DAZ Studio. The current latest version is always posted up at the top of the DAZ Studio Discussion forum. I recommend getting the latest Beta rather than the stable official release because it’s faster, better supported and works with a wider range of graphics cards. You’ll also need a (free) registration number which can be auto-generated for you, here.
- The 3D Bridge Starter Pack. This is an awesome free starter pack of figures and models (Dragons and Elephants and Spaceships! Oh my!) that’ll keep any aspiring 3d addict busy for months. I wrote about it back in July 2008 and threw together a few sample images created entirely using just this pack – including the iconic image we’re going to make right now.
The main figure in the image is Aiko 3. She was released back in November 2004, which in 3d terms is positively dinosauric, yet A3 still remains one of the most popular and well-loved characters ever made. One reason for her lasting success if that, unlike most other figures, Aiko 3 comes with all of the morph dials built right in.
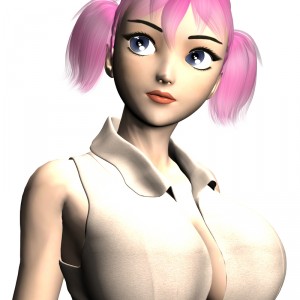
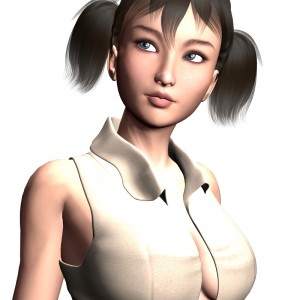
From total manga to realism, or anything in between, just a spin of the dials away
Aiko 3 also less demanding than the full Victoria 4.2 figure when it comes to system resources, meaning she’s a great figure to use on a lower-powered computer. The male equivalent to Aiko 3 is Hiro 3, and he’s also available for free (along with Michael 3 and Victoria 3) in this pack at download.com. Good word that. Free.
Back to the scene. Install DAZ Studio, get the 3D Bridge Starter Pack and download it all from My Account->Available Downloads at DAZ 3d. Install all your new goodies and giggle like it’s Christmas and you’re six again. Go right ahead. I’ll wait.
Done? Cool! Time to fire up DAZ Studio.
We’re going to be rendering a square image rather than one which fill the entire screen, partly because they’re blog friendly, but also so you know how to change the size of your final output. DAZ Studio can create images limited only by the size of your imagination and computer’s capacity. Most high-res skin textures tend to be around 4000×4000 in resolution though, so that’s a practical (huge!) limit to work with. I tend to render at the web-friendlier 800×800 resolution, so that’s what we’ll do.
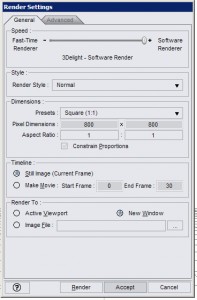
In the top menu, go to Render->Render Settings and set the Presets to Square (1:1), Pixel Dimensions to 800×800 and tell it to render in a New Window. It should look like this:
While you’re there, take a peek in the Render Style dropdown. DAZ Studio can do Cartoon renders, right out of the box! Cool eh? We’ll be looking at those (and how to get even better results) another time.
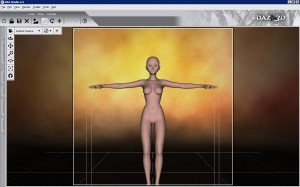
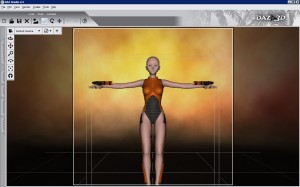
Go to Figures->Environment and load in the orange coloured backcloth, then head into Figures->DAZ Aiko 3 and double-click !Aiko3 to bring her into the scene. You should see something like this:
So far, so bald and naked. Let’s fix that. Go into the Scenes tab and make sure Aiko is selected. It’s worth doing this every time you add a new figure to a scene to just be sure that what you want selected, is what’s selected.
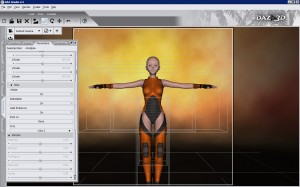
Head into Figures->Aiko Morphing Clothes and add the Mech Girl Bodysuit, Boots, Gloves and Pants. You’ll probably see something like this:
Oh noes! The clothes don’t fit! Send them back! Not to worry, we just need to conform them so that DAZ Studio “knows” they’re fitted to the Aiko 3 figure. Newer figures and clothing is set to auto-conform to the currently selected figure, but it’s worth getting into the habit of checking regardless.
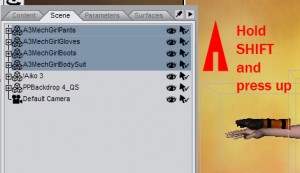
Here’s a trick that makes it easy to conform a whole bunch of stuff all in one go. Head into the Scenes tab and select the bottom item that you want to conform. Hold down the SHIFT key and press the up cursor until all of the other items are selected, like this…..
Next, head into the Parameters tab and select Fit To, Aiko 3. Tada!
Head into the Scenes tab and select Aiko 3 again. Time to give her hair. In the Content tab, go into Hair->DAZ Aiko 3 Hair and select A3 Mitsu Hair-P56.hr2. Hair that’s added from the Hair section does auto-conform, so it’s already attached to Aiko’s head. Which is nice.
Now to give Aiko a bigass gun and kewl shades. Content tab again, this time go into Props->MechGirl and select the P5 version of the Gun and Razor shades. As they’re Props, they (like Hair) auto-conform too. Which is also nice.
All of this conforming and auto-conforming nonsense means is that when Aiko 3 moves, the objects move with her. If the gun, hair and clothes weren’t conformed they’d just hover there while Aiko ran around naked. And that would be Very Silly Indeed.
Almost done!
Time to pose Aiko. Go to Pose->!DAZ’s Aiko 3 and double-click on a pose you like (Aiko 3 is still selected, isn’t she?). It’s likely that Aiko’s feet are poking through the boots, so go to to Pose->MAT MechGirl and select !Hide Feet. There. Better.
Finally, let’s improve the lighting. Go to Lights->Environment and choose one of the light sets. I picked WildLights. Later, I’ll show you places to get lots of lovely cool (or hot) new light sets.
Hit CTRL-R to render.
Woohoo!
But that’s not all. It’s just the beginning. Heck, it’s the beginning of the beginning. It’s the beginning of the beginning of the….. ok, you get the idea.
Want to change Aiko’s hair colour? Select the Hair in the Scenes tab (you’ll need to drill down through Aiko’s Hip, Abdomen, Chest, Neck and Head to find it. Messy) then go to Pose->MAT Aiko 3 Hair-PP and go wild. Want to change the suit to leather instead of vibrant orange, or mix-and-match. Pick the suit part and choose a new texture from Pose->MAT MechGirl. New textures for Aiko? Pose->!MAT Aiko 3 and Pose:!MAT Aiko 3 Maps. Select the Default Camera and change the focal length from 65mm to 80, 200 or 300mm – or anything else. Alter the camera’s x, y and z or rotate it to get awesome camera angles. Add in another Aiko (or Hiro, or Vicky, or….) and have a blazing gun battle. Or anything else you want.
When you’ve done, don’t forget to save the render in File->Save Last Render, and save the scene (File->Save) for posterity. If you want, load the image into Photoshop for even more fun and games.
Till next time!







You make it look so easy, but of course, nothing worthwhile ever is. Here’s mine:
Or rather, here it is: http://twitpic.com/tjrf
Hey that’s good!
I’d suggest you move Aiko up a touch. Select her, then in the Parameters set ytran to about 10, then fine-tune up or down as needed to get her kneeling properly.
In the Scenes tab, if you drill down through Aiko to her Right Forearm you can bend that up a little too so her gun is raised up too, and you’re done.
Well done you :D
Thanks so much for your information. My friend was showing me a lot of this the other day, but for some reason I can’t get the poses to stay or show up on the figure once it’s fully clothed. This is my first trail run on doing it by myself. So I’ll need all the help I can get.
Welcome along, Carrie!
The key is to make sure that the clothes are conformed – that means that DAZ knows they’re attached to the figure so that when it moves, they move too instead of just hanging there in mid-air. But you already found that out, right? :D
If you’ve any questions, just ask.
Yes, Conforming clothes to the figure is a must. :)
Eltons last blog post..The Known Realms
Okay, so I made a render based on this tutorial, wants to show you what it looked like. Hopefully I get a passing grade on this one ;)
http://www.enigmatic-dreams.org/dazstudio/ActionGirl.jpg
It was created completely in DAZ Studio, with nothing other than what you have suggested we get as freebies.
@Cypherwulfe Excellent! Yep, that gets a pass :D
Looking forward to seeing what you come up with next!
Did something happen to your blog? I clicked the link on the right, http://greywulf.net/tag/tutorial/
and it keeps showing up as not existing now.
Well that’s worrying. All of my categories and tags have vanished! Looking into it now….
I was going to mention, after your comment about seeing what I come up with….
My whole purpose to start using DAZ Studio is that I have written 2 chapletes of a short story I have been working on… I want to animate and make a video out of it. if you have myspace, you can add me and read them.
Or I can email the stories either way.
http://www.myspace.com/cypherwulfe