AKA the “how to get rid of that purple rash” edition.
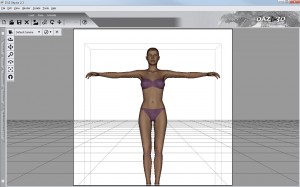
One of the questions I’ve been asked the most (and one of the most common search terms on this blog) is how to get rid of the purple rash from the default Victoria 4.2 figure. This time around we’re going to look at how how to solve this, and other related issues. Expect nudity!
Fire up DAZ Studio and load Victoria 4.2 into a blank scene and she looks like this:
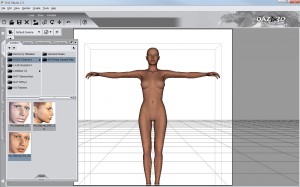
Yuk! It looks like Vicky is allergic to her washing detergent. She ought to change brands. In fairness, it’s not a bad base texture once you get some clothes on her frame to hide that awful rash. It is also very low resolution meaning it takes up very little memory to use. Sometimes, I leave adding a higher-resolution texture to figures to after I’ve posed, positioned and lit everything. The scene handles much more quickly that way. More often, I’ll switch it out for the baseline nude low-resolution texture that’s also provided with all Victoria 4.2 figures (including the EZ one provided for free with DAZ Studio). With Vicky selected (head into the Scenes tab and click on her if not), go into Poses->DAZ’s Victoria 4->MATerials Sample-Res and double-click !All_Natural_NG_QS.
Much better! No nipples though, which is just…. well, weird. This is actually a surprisingly good texture. It takes bright lights particularly well and sometimes I just use this one as-is for renders. The low-resolution means it’s not great for close-ups, but for full-body renders at 800×800, it does the job pretty well. Just add hair, clothes, a decent lightset and you’re good to go.
Ok, so it’s not perfect. If you want to render close-ups or nude figures then let’s face it – you’re going to need a higher resolution texture. And nipples. That’s where character packs come in. These provide new textures for your base figure as well as morphs which alter the face and/or body to create a unique character. Many of the characters require a morphs++ pack for the figure to alter the appearance correctly, but some don’t. One of my favourite characters for Victoria 4.2 is Colleen – and she’s a freebie! The custom headshape doesn’t require any additional morph packs either so it works just fine with the free Victoria 4.2 EZ too, which keeps the memory requirements good and low during use. If you want to use the texture or headshape with a morph pack (such as Aiko 4), it works just fine too. The texture looks excellent on A4.
Download her and unzip the archive into your DAZ Studio/content folder. With Victoria 4.2 selected go into Poses->Moonfire->Colleen-Free and INJect the head shape and apply the skin texture. If you want to change the default eye or lips colour, select those too. Here’s a close-up of the previous scene using Colleen’s headshape and textures.
Nice, eh? And this isn’t even a particularly high-res texture either. Want a few more?
There’s no shortage of character packs for Victoria (3 and 4), Michael (3 and 4) and all the rest available from daz3d.com, renderosity, sharecg.com and others. My recommendation is this: don’t get too many. A couple with a wide range of skin tones, eyes and lip shades is far more useful than a clogged up Runtime folder full of near-identical characters. Chances are you’ll only use two or three of them regularly, so just get two or three, and ignore the rest. Easier said than done, I know.
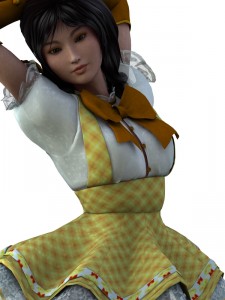
There’s a truism in photography that applies equally well to rendering: great lighting is more important than great make-up. For example, here’s a render of Aiko 3 wearing a Japanese Anime schoolgirl outfit thingy. I dunno. Whatever.
That’s the basic Aiko 3 texture and a single Distant Light. It’s passable, but hardly going to win any prizes. Replace that light with UberEnvironment and apply a pwSurface Shader to the skin texture to make it really catch the light, and………
Result! Same scene, different light setup, 10,000 times better.
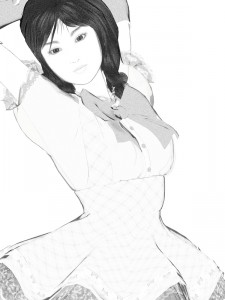
It’s worth mentioning one last thing. “Better” doesn’t necessarily have to mean “more realistic”. Much better to find a style that’s sympathetic with the scene. For example, here’s Aiko 3 again, this time rendered (thanks to pwSketch) in a more Manga style.
Better? I think so.
Next time: Clothing poke-through, and how to deal with it.
Till then!

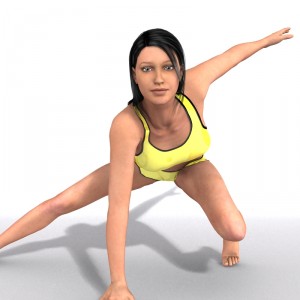
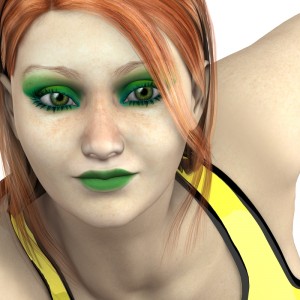


Whoa! Nice renders, Greywulf. As an aside, why not do up some stats for Miles Gloriosus? M&M Stats, if you prefer. :)
Eltons last blog post..Miles Gloriosus, Paragon of Virtue